Center-cut Job Management
This screen manages center-cut information.
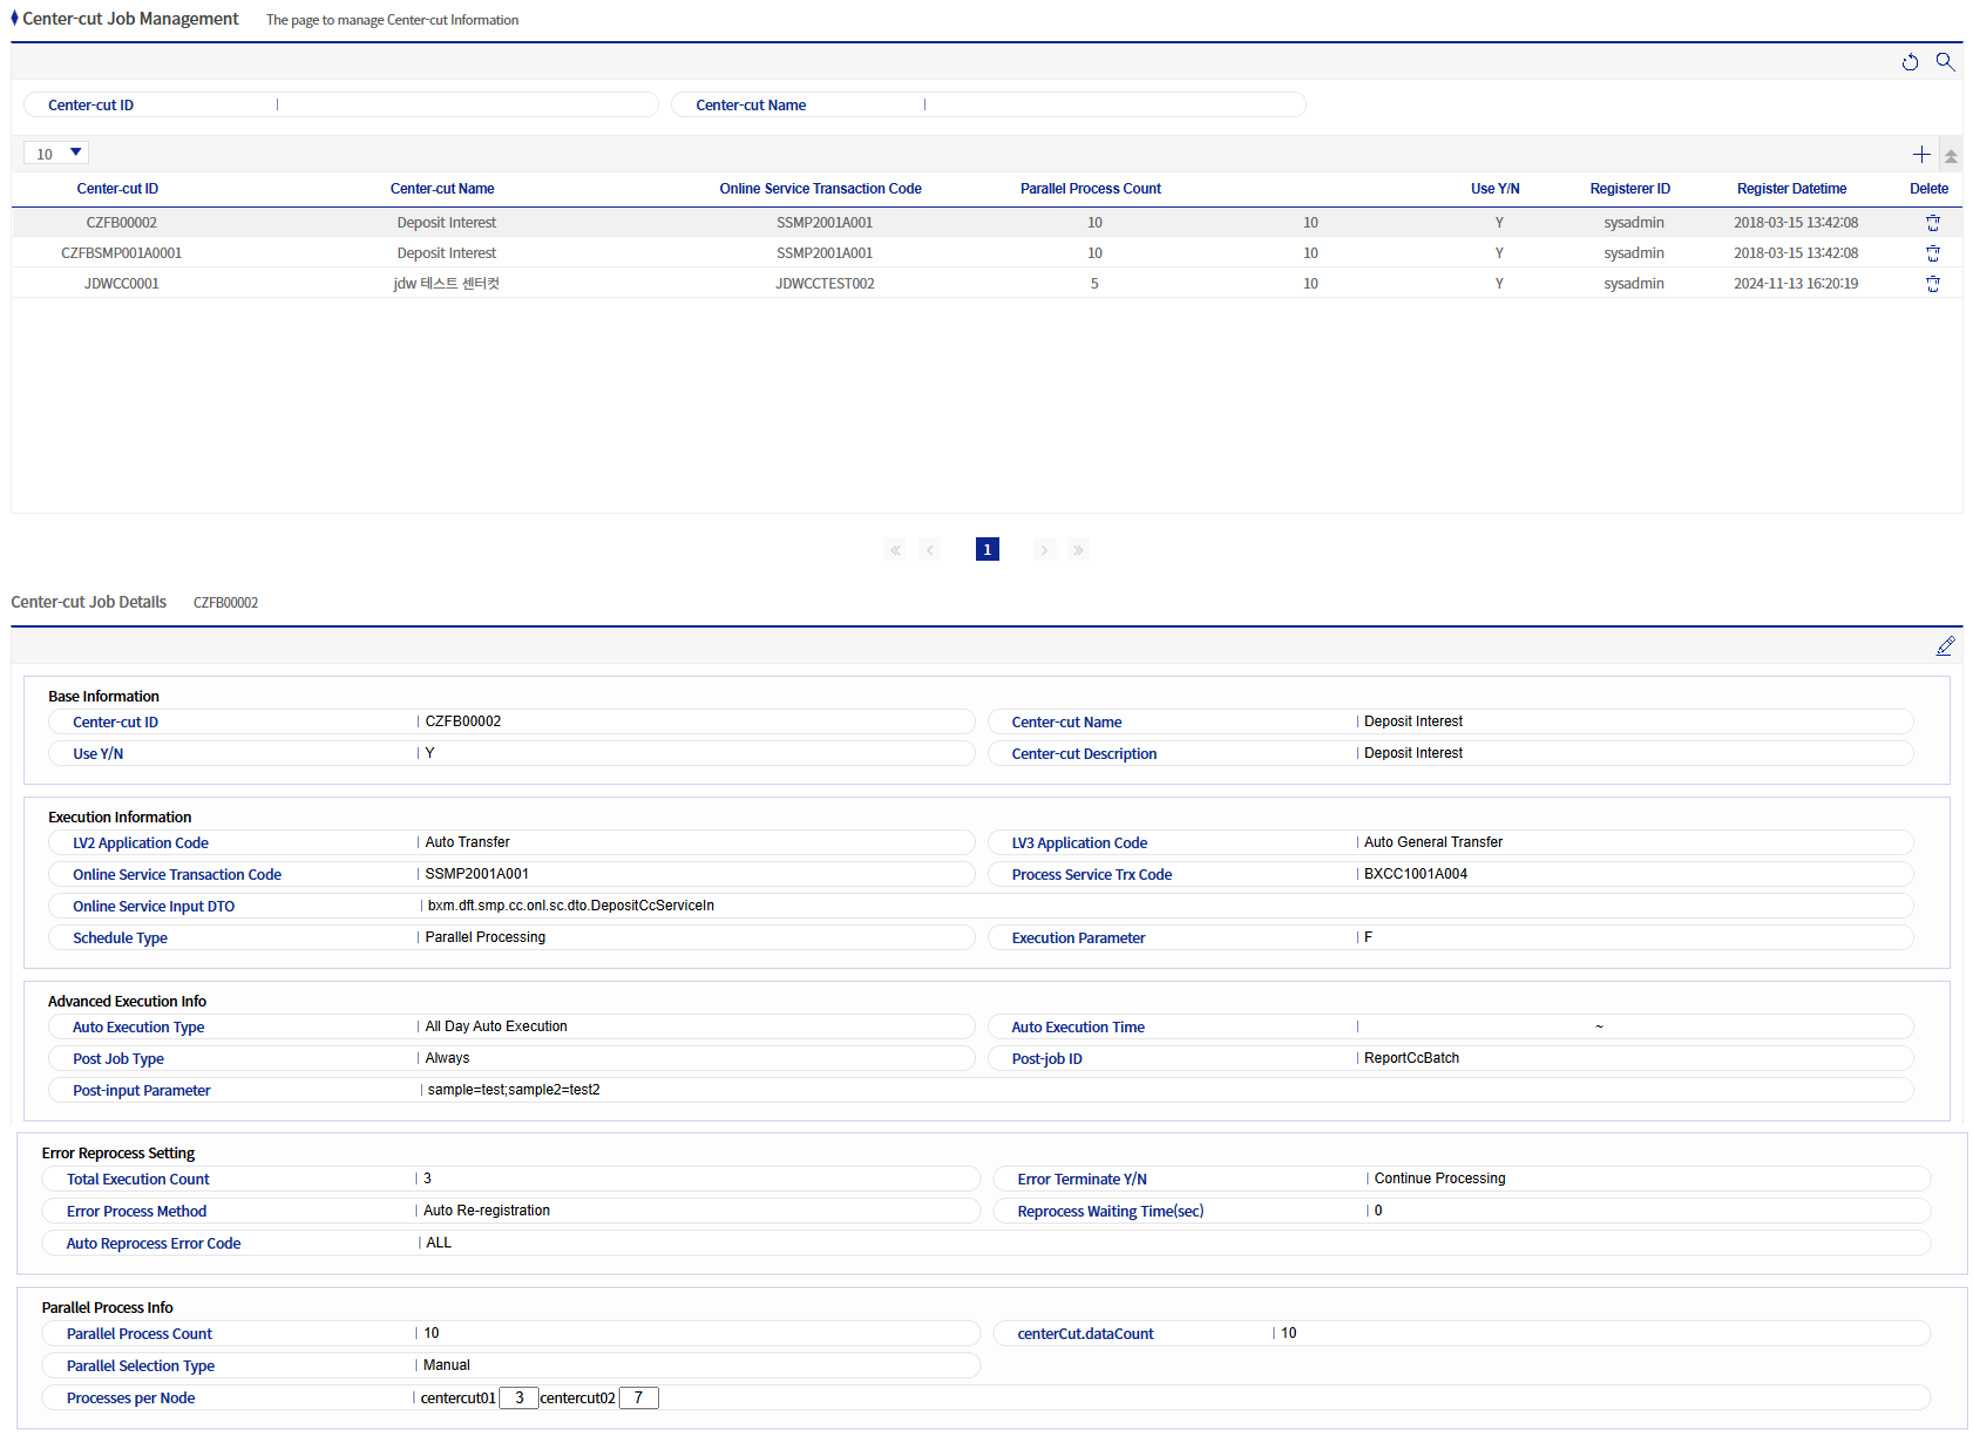
1. Center-cut Job Details
Refer to the following table for descriptions of each field.
1.1. Basic Information Field List
| Field name | Description |
|---|---|
Center-cut ID |
Enter the ID of the center-cut job (maximum 12 digits). |
Center-cut name |
Enter the name of the center-cut job. |
Usage status |
Determine whether the center-cut job is used. |
Center-cut description |
Enter a description of the center-cut job. |
1.2. Execution Information Field List
| Field name | Description |
|---|---|
LV2 application classification |
Select the application classification value for LV2. |
LV3 application classification |
Select the application classification value for LV3. |
Online service transaction code |
Enter the transaction code of the online service to be called by the processing service. |
Processing service transaction code |
Enter the transaction code of the processing service to be called by the main service. |
Online service input DTO |
Enter the FQN of the DTO to be used when the processing service calls the online service. |
Split method |
Select the processing method of the center-cut job. |
Log level |
Select the log level. |
Execution parameter |
If there are additional parameter values for center-cut execution, enter them here. Using the function of Dynamic Setter in OMM, this value is entered into the field named "ccExecParam" and passed to the online service. |
1.3. Advanced Execution Information Field List
| Field name | Description | ||
|---|---|---|---|
Automatic execution |
Determine whether the center-cut job is executed automatically. |
||
Automatic execution time |
Can be entered only when automatic execution is set to "Automatic execution only during allowed time". |
||
Follow-up job classification |
Determine the status in which the follow-up job will be executed. Follow-up jobs can only be batch. |
||
Follow-up job ID |
Enter the batch job ID to be executed as the follow-up job. |
||
Follow-up input parameter |
Enter parameters to be passed to the follow-up batch job. If there are multiple parameters, separate them with ";".
|
1.4. Error Reprocessing Settings Field List
| Field name | Description | ||
|---|---|---|---|
Total execution rounds |
Determine the total number of execution rounds for the center-cut job. The default execution is 1 round, and it increases by 1 each time error reprocessing is performed. |
||
Stop on error or not |
Determine the status when an error occurs.
|
||
Error handling method |
Determine how to handle data for which an error occurred. |
||
Reprocessing wait time |
If the error handling method is "Automatic re-registration", the data for which an error occurred is automatically re-registered after the time registered in this field has elapsed (unit: minutes). |
||
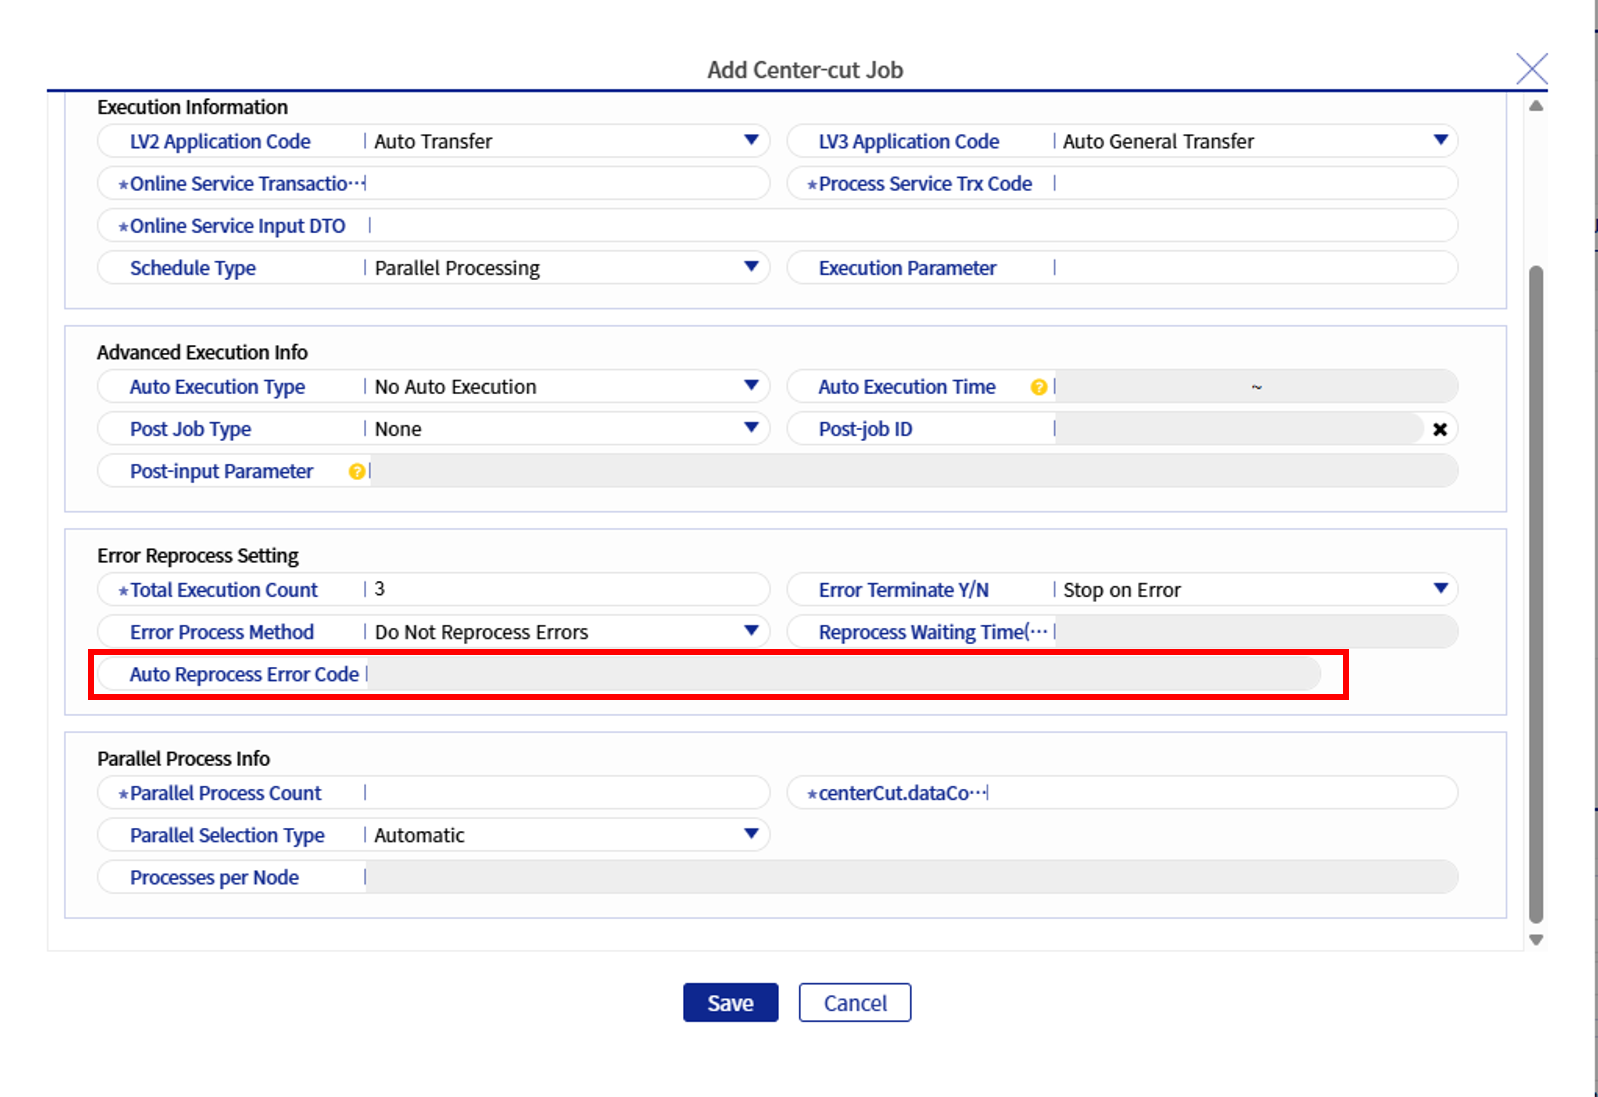
Automatic reprocessing error code |
If the error handling method is "Automatic re-registration", classify the targets to be automatically re-registered based on the registered error codes.
|
1.5. Parallel Process Information Field List
| Field name | Description | ||
|---|---|---|---|
Number of parallel processes |
Enter the total number of processes to be used for the center-cut job. The main service creates threads equal to the entered number and calls the processing service. |
||
Number of data items |
Enter the number of data items that the processing service will repeatedly process. |
||
Parallel specification method |
Determine the method of specifying parallel processing. |
||
Number of processes per node |
If the parallel specification method is "Manual", you must enter the number of processes for each node.
|
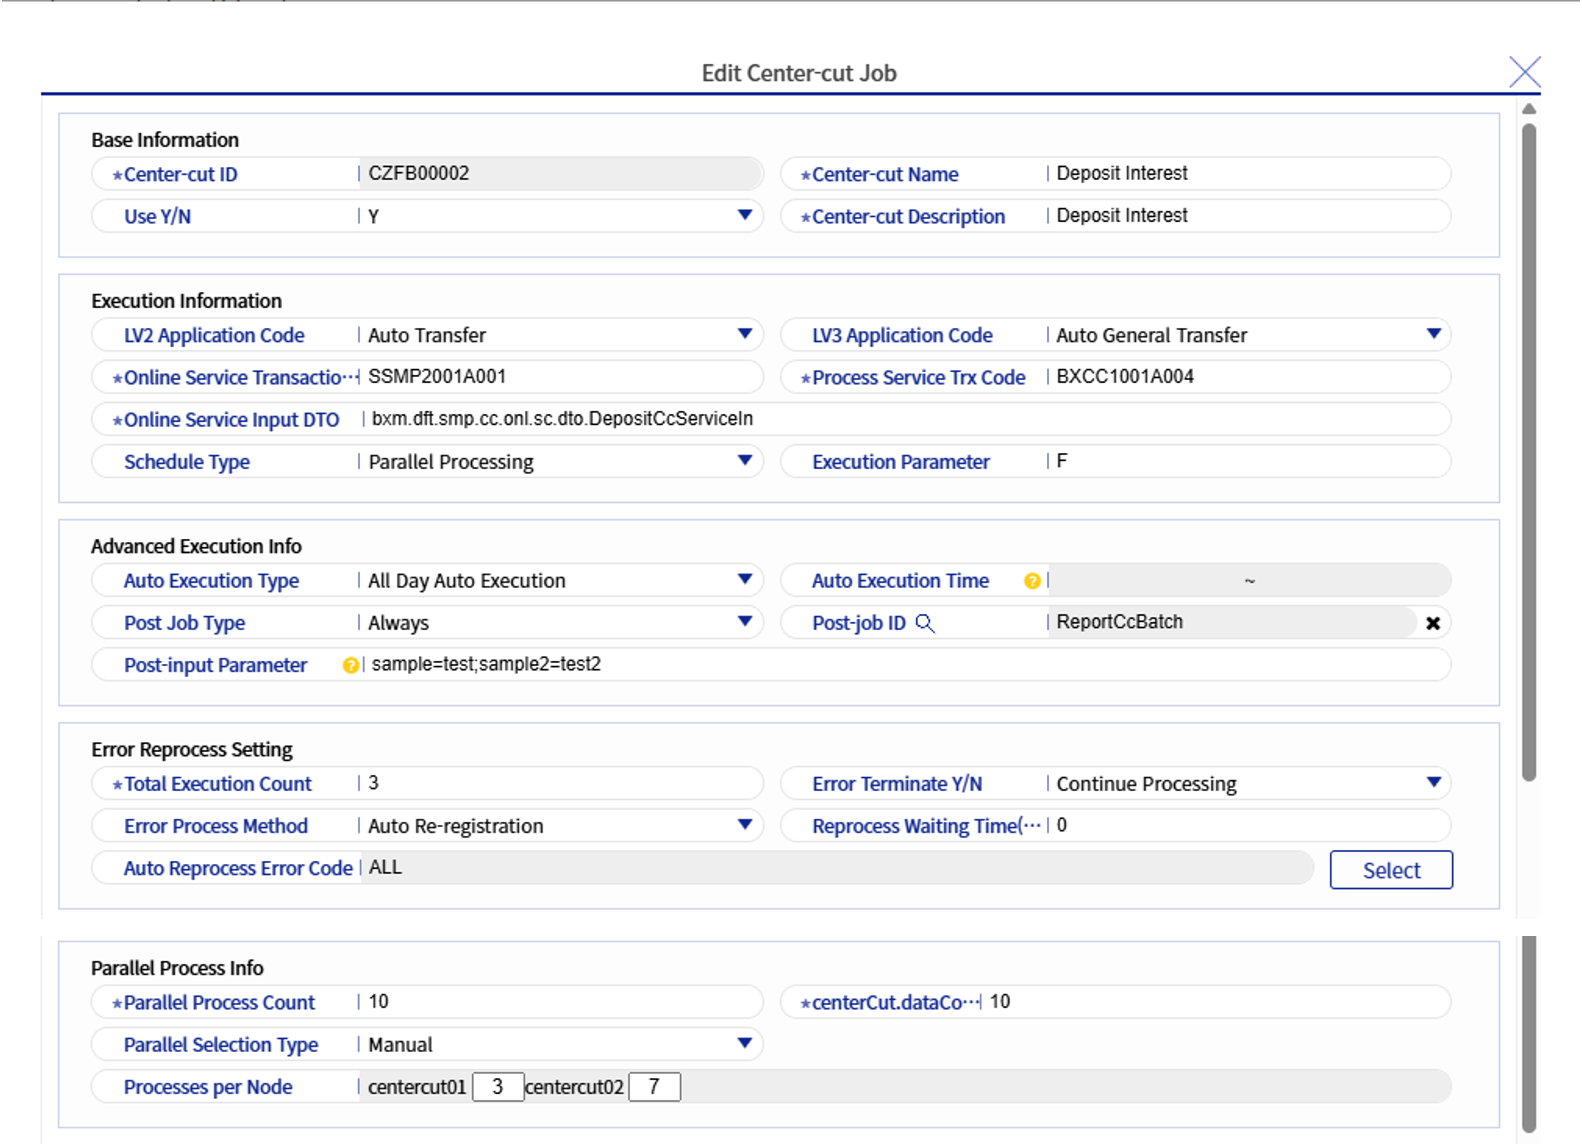
2. Add/Modify Center-cut Job
-
Each field is the same as in Center-cut Job Details.
-
The Automatic Reprocessing Error Code field is not entered directly but selected. It is selected on the following screen.
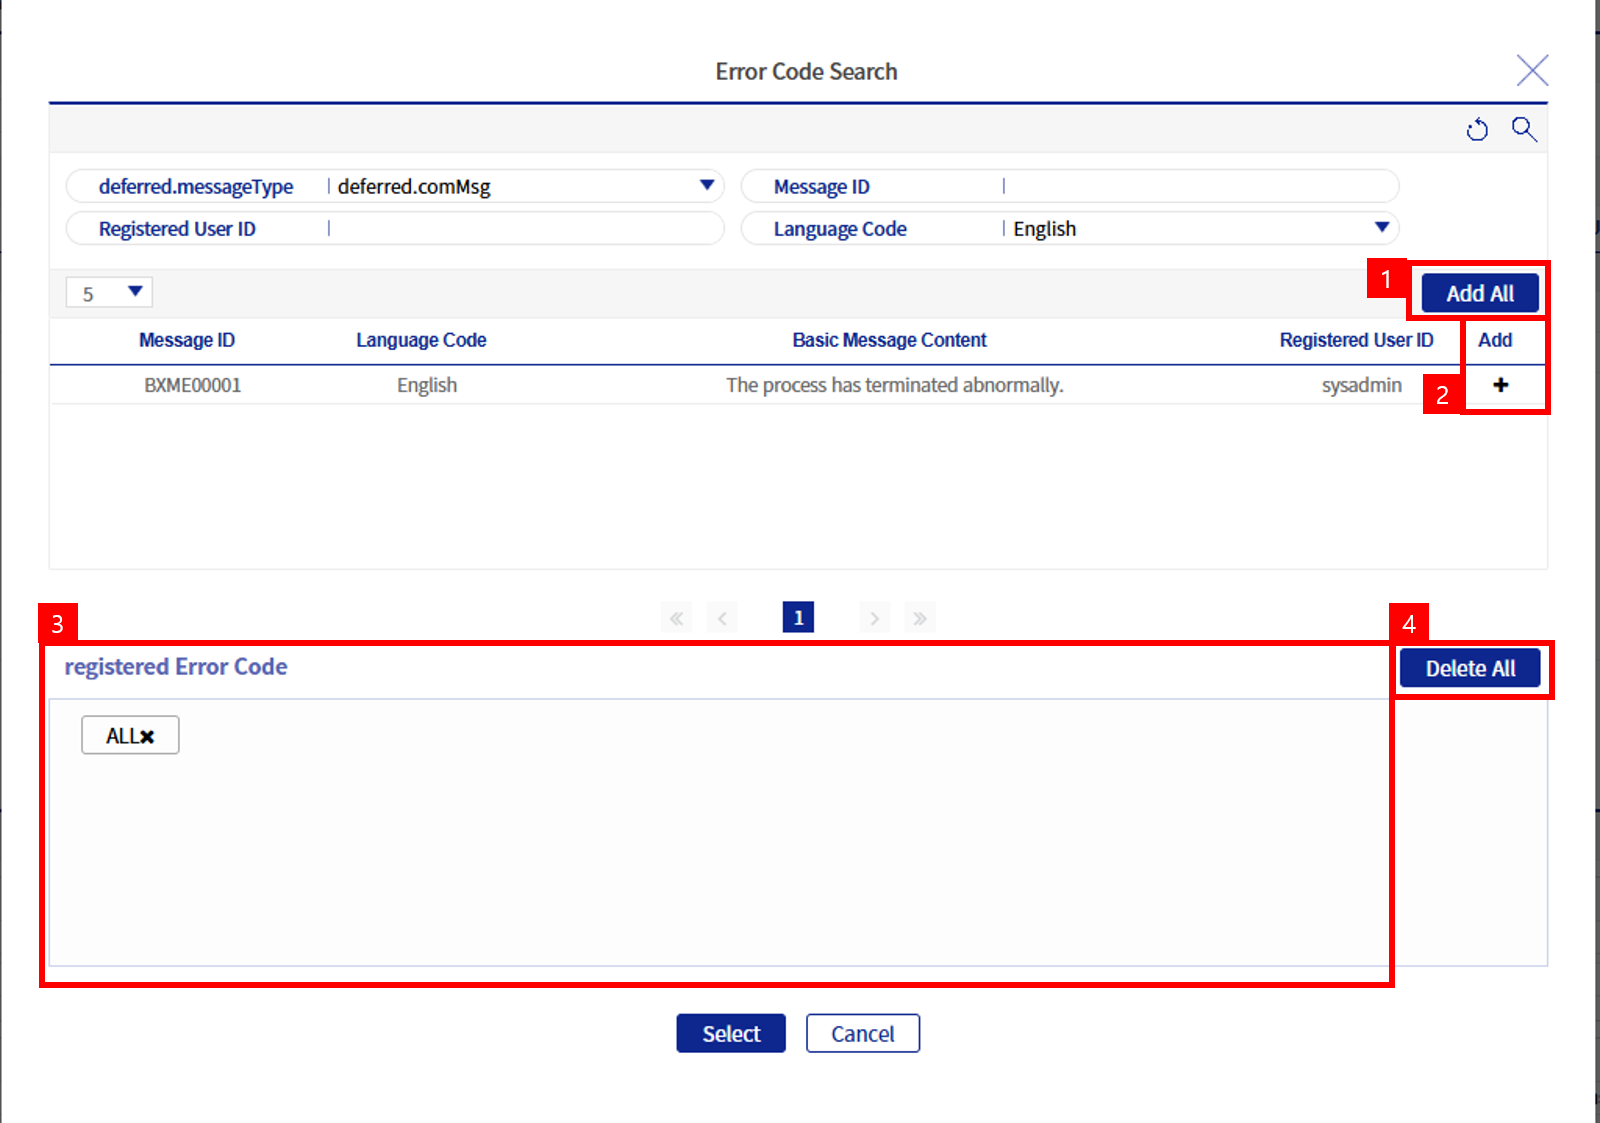
-
Search can be performed by message ID, registered user ID, and language code. When you click the [+] button, the message ID in the Registered error code box is selected.
-
1: When you click the [Add all] button, the ALL box appears for the registered error codes. ALL is used when you want to register all error messages.
-
2: When you click the [+] button, the message ID of the relevant row is selected. It appears as follows.

-
3: This box shows the list of registered error codes.
-
4: When you click the [Delete all] button, all the code list in the registered error codes disappears.