Web Admin Installation Verification
-
Run the Web Admin WAS installed in $BXM_HOME/tomcat9_admin.
-
Check whether the Tomcat process is running normally. The detailed process information may differ from the example below.
bxm 3343 1 12 14:05 pts/0 00:00:48 /usr/lib/jvm/java-1.11.0-openjdk/bin/java -Djava.util.logging.config.file=/home/bxmv5/tomcat9_admin/conf/logging.properties -Djava.util.logging.manager=org.apache.juli.ClassLoaderLogManager -Dbxm.node.name=DFT1 -Dbxm.instance.name=webadm1 -Dcom.atomikos.icatch.file=/home/bxmv5/bxm/lib/jta/jta.properties -Xms1024m -Xmx1024m -XX:MaxPermSize=256m -XX:+UnlockDiagnosticVMOptions -XX:+UnsyncloadClass -Djdk.tls.ephemeralDHKeySize=2048 -Djava.endorsed.dirs=/home/bxmv5/tomcat9_admin/endorsed -classpath /home/bxmv5/tomcat9_admin/bin/bootstrap.jar:/home/bxmv5/tomcat9_admin/bin/tomcat-juli.jar -Dcatalina.base=/home/bxmv5/tomcat9_admin -Dcatalina.home=/home/bxmv5/tomcat9_admin -Djava.io.tmpdir=/home/bxmv5/tomcat9_admin/temp org.apache.catalina.startup.Bootstrap start -
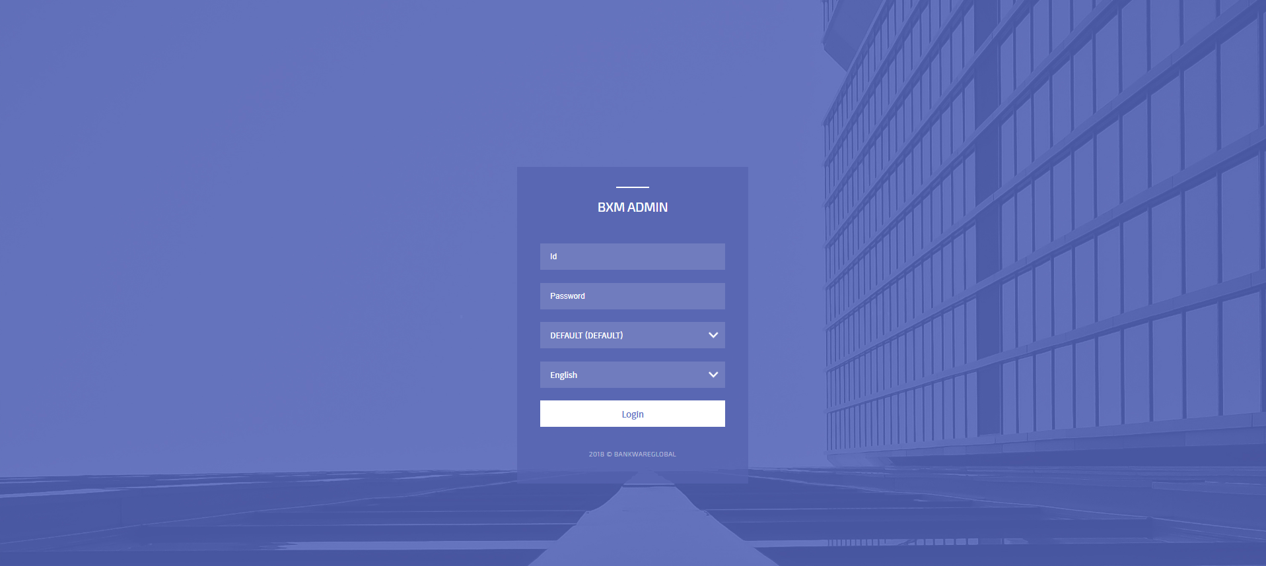
Launch a web browser, enter the URL below, and check whether the BXM Web Admin page is displayed.
http://[admin_host_ip]:[admin_port]/bxmAdmin
-
Try logging in with the default sysadmin/sysadmin account. The two fields below are for domain and language settings, respectively. Leave the domain as DEFAULT and select the appropriate language for the user.
-
If the web page is working normally, run BXM Studio to test the Studio login.
-
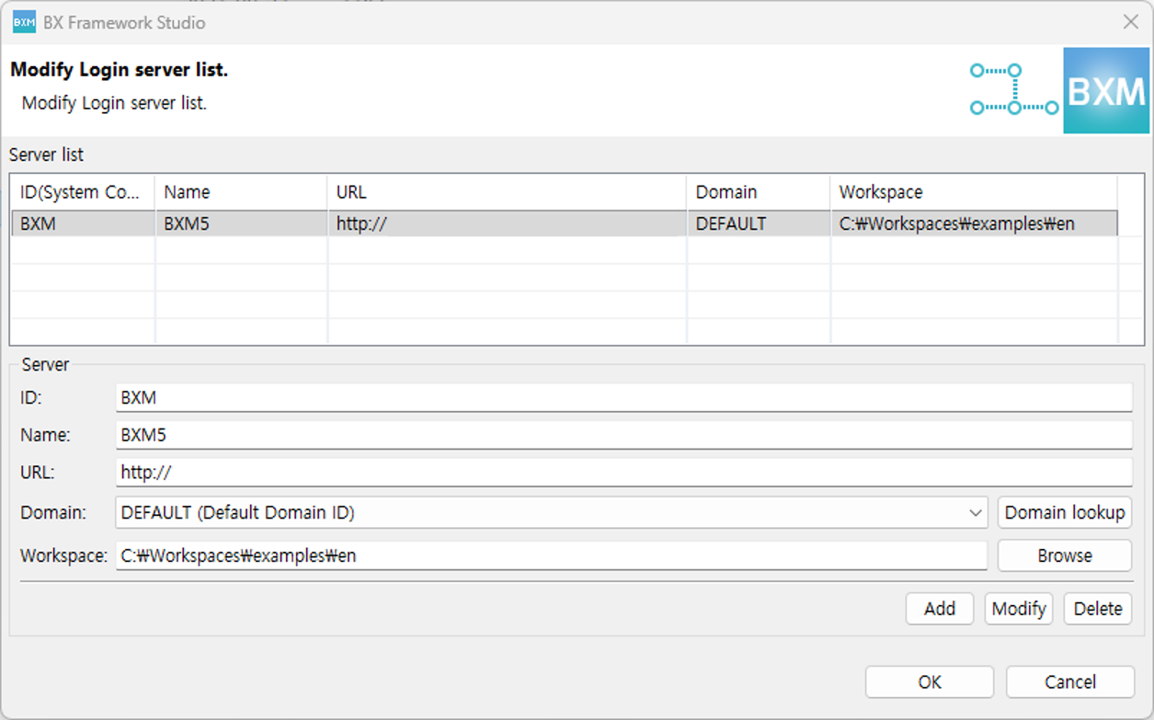
In the login window, open 'Login Settings'.
-
Enter the Server information as described below and click Add.
-
ID, Name: Enter any desired BXM server name. ID can be up to 3 characters.
-
URL: Enter as follows according to the address and port number of the Web Admin WAS configured earlier.
http://[admin_host_ip]:[admin_port]/bxmAdmin/studio/bxmServlet/LoginService
-
Domain: After entering the URL, click Domain Search to retrieve the domain list.
Select DEFAULT, which was created earlier in the BXM_DOMAIN table. -
Workspace: Use any workspace path you want.
-
-
If there is no domain input section, go to the directory where BXM Studio is installed, open the BXM.ini file, and add the following under -vmargs, then run it again.
... -vmargs -Dbxm.domain.use=true ... -
Click OK, select the server you just created in the login window, and log in with sysadmin/sysadmin.

-
If Web Admin has been installed correctly, the login will succeed and BXM Studio will start.