Local Development Environment
Provides a function to test developed applications in the local development environment.
1. Local Development Environment Layout
To configure the local development environment, proceed in the following order.
-
Installation
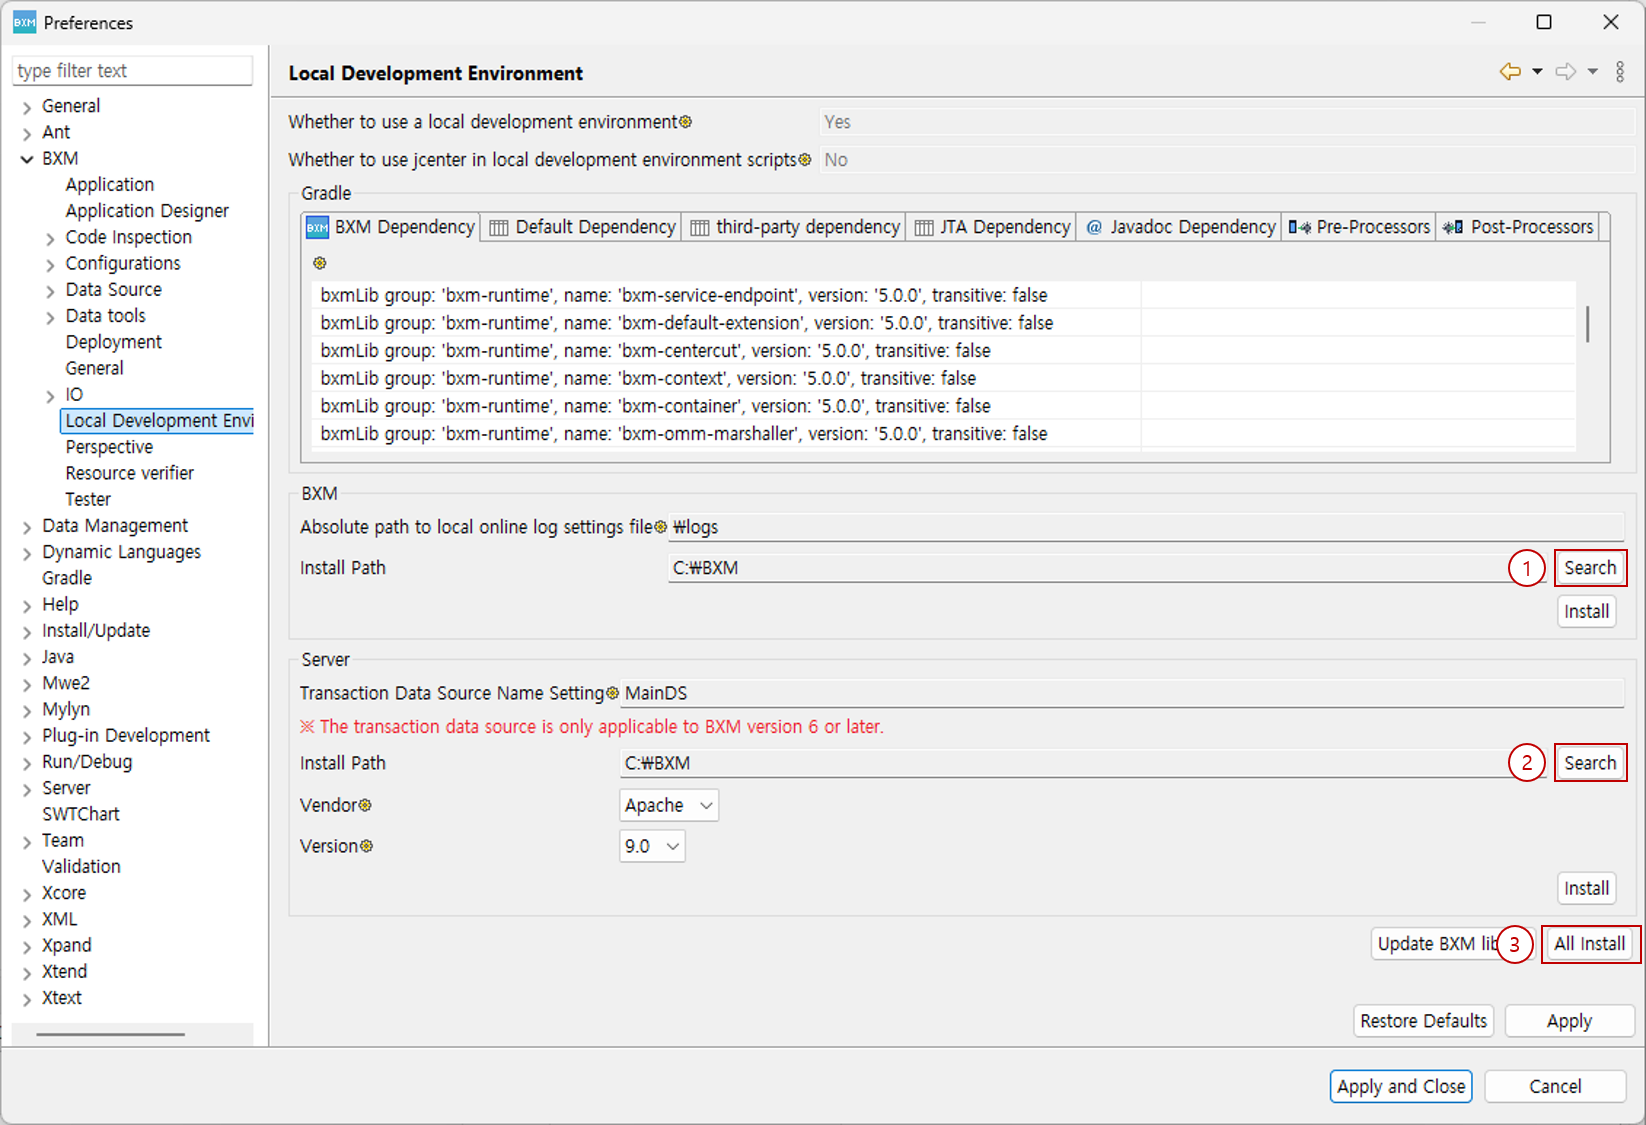
(1) Select BXM install path
(2) Select WAS(Tomcat) install path
(3) Click All Install -
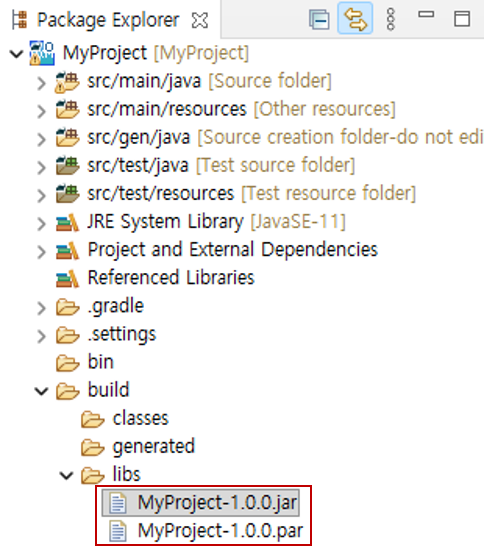
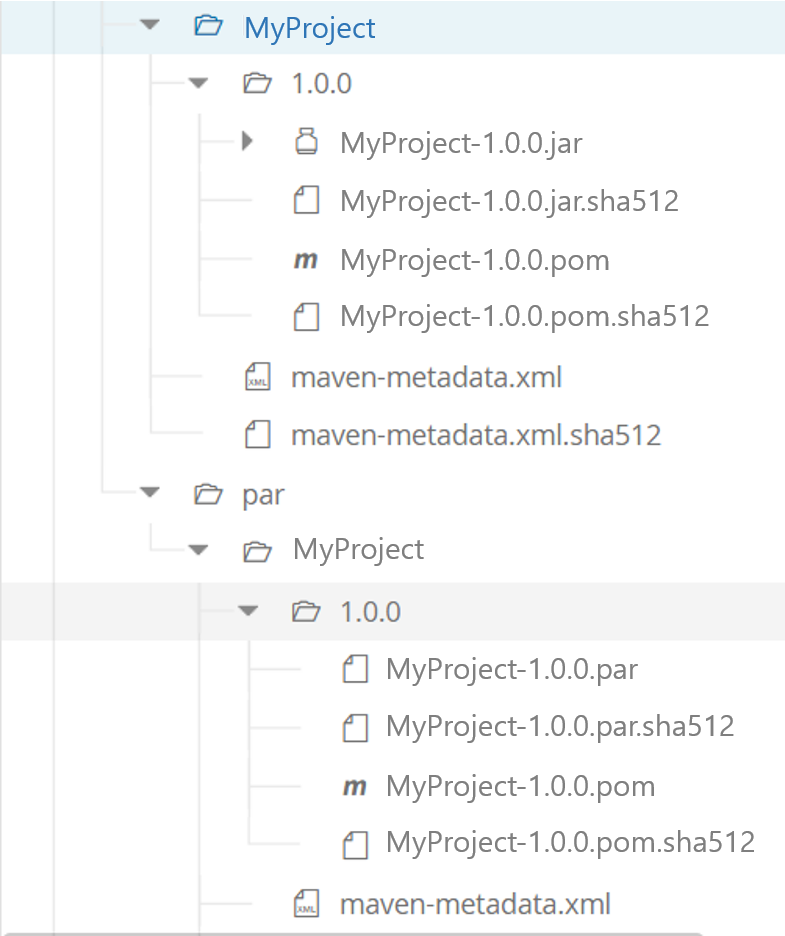
Created Resources
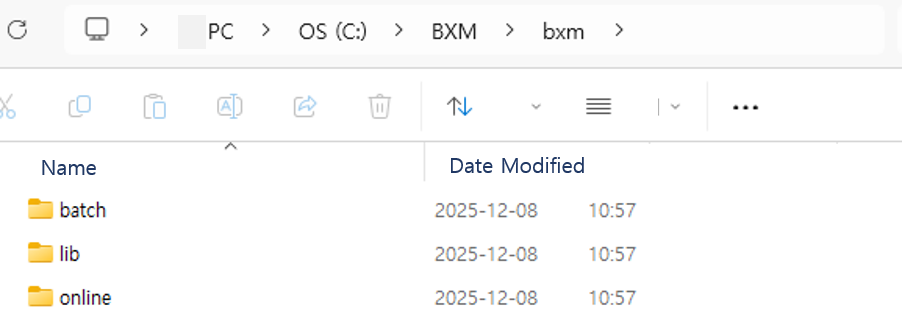
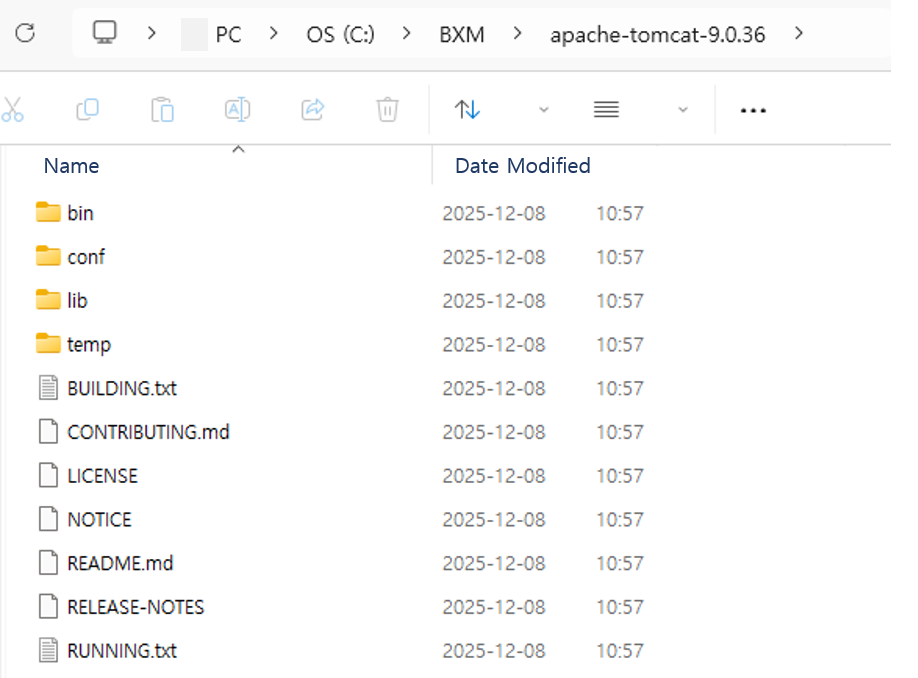
-
Configuration
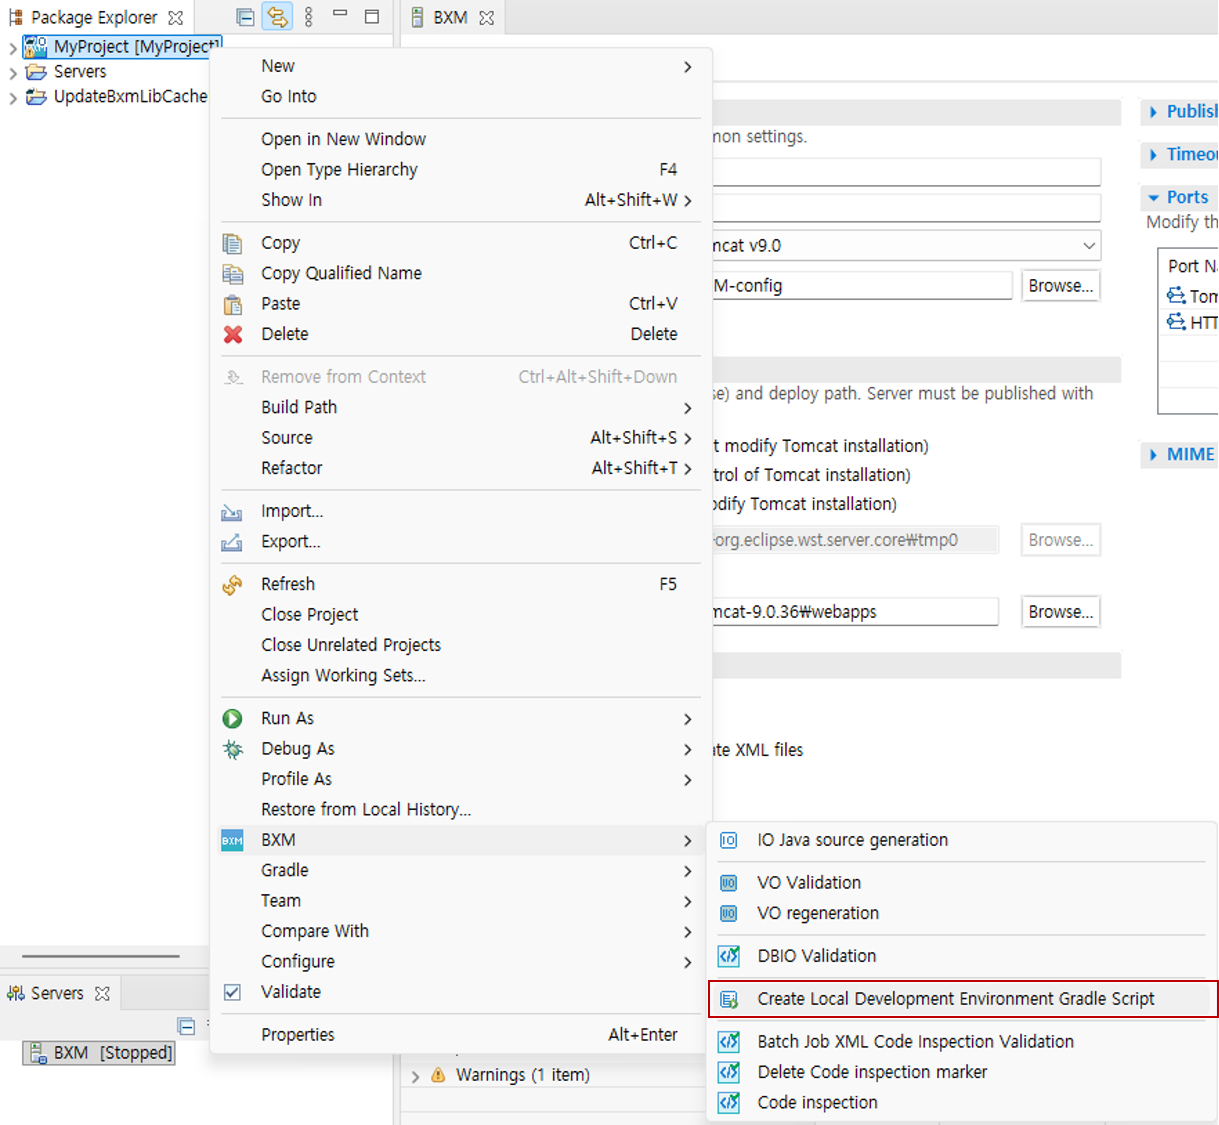
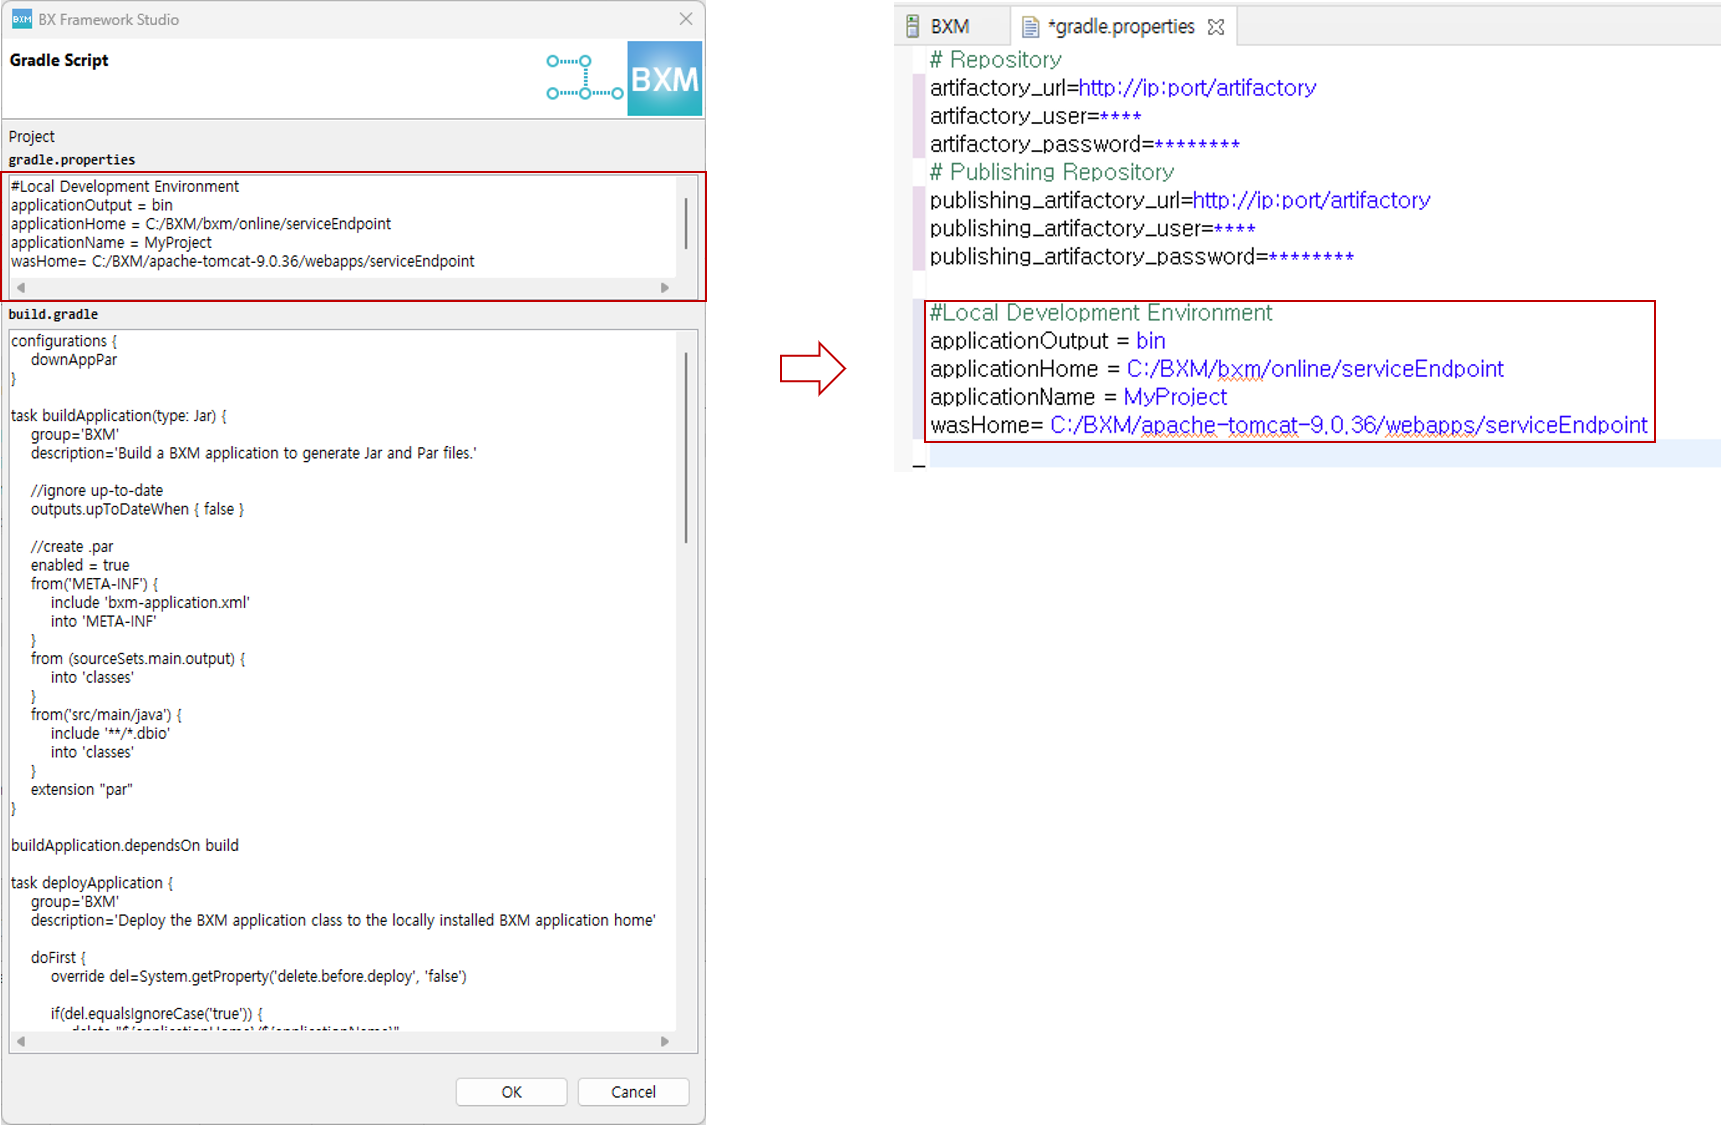
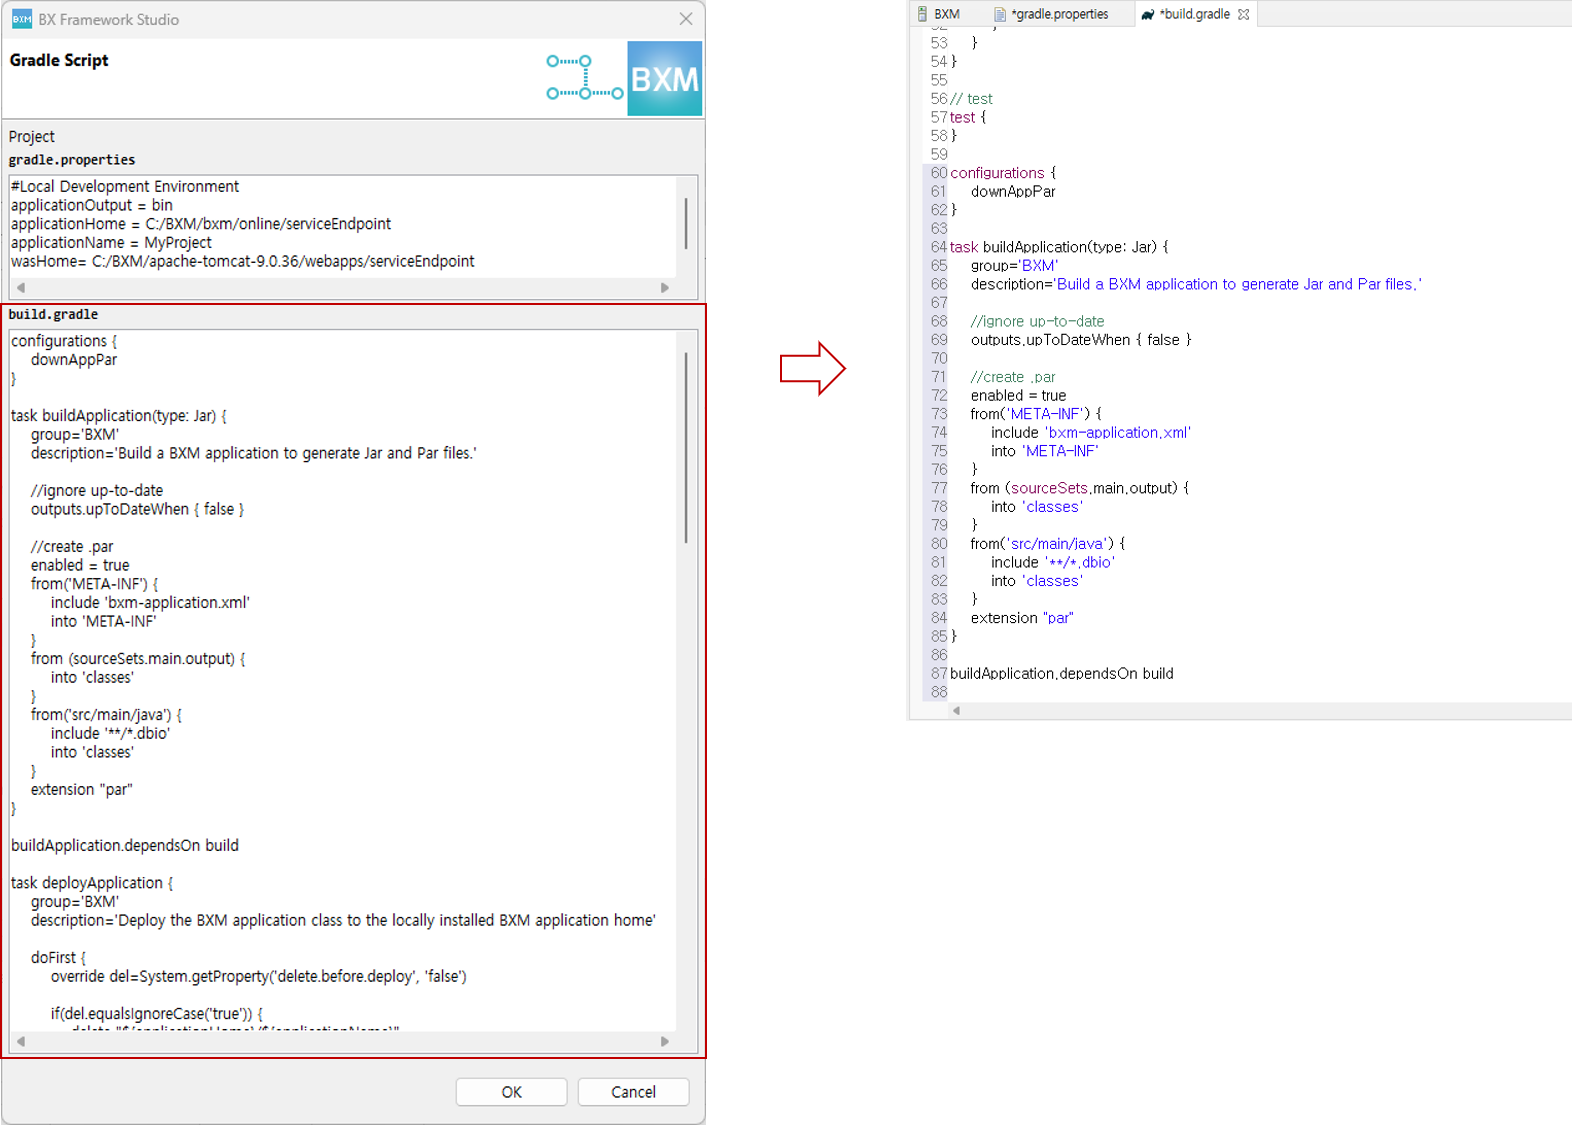
Right-click the project → BXM menu → Create Local Development Environment Gradle Script, then copy and paste the script.
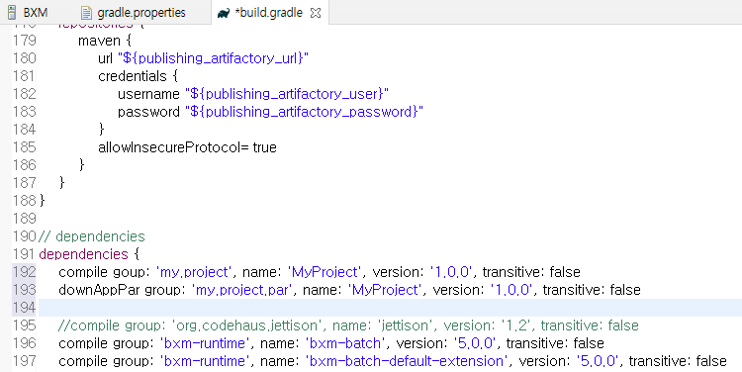
Add dependencies (jar, par)
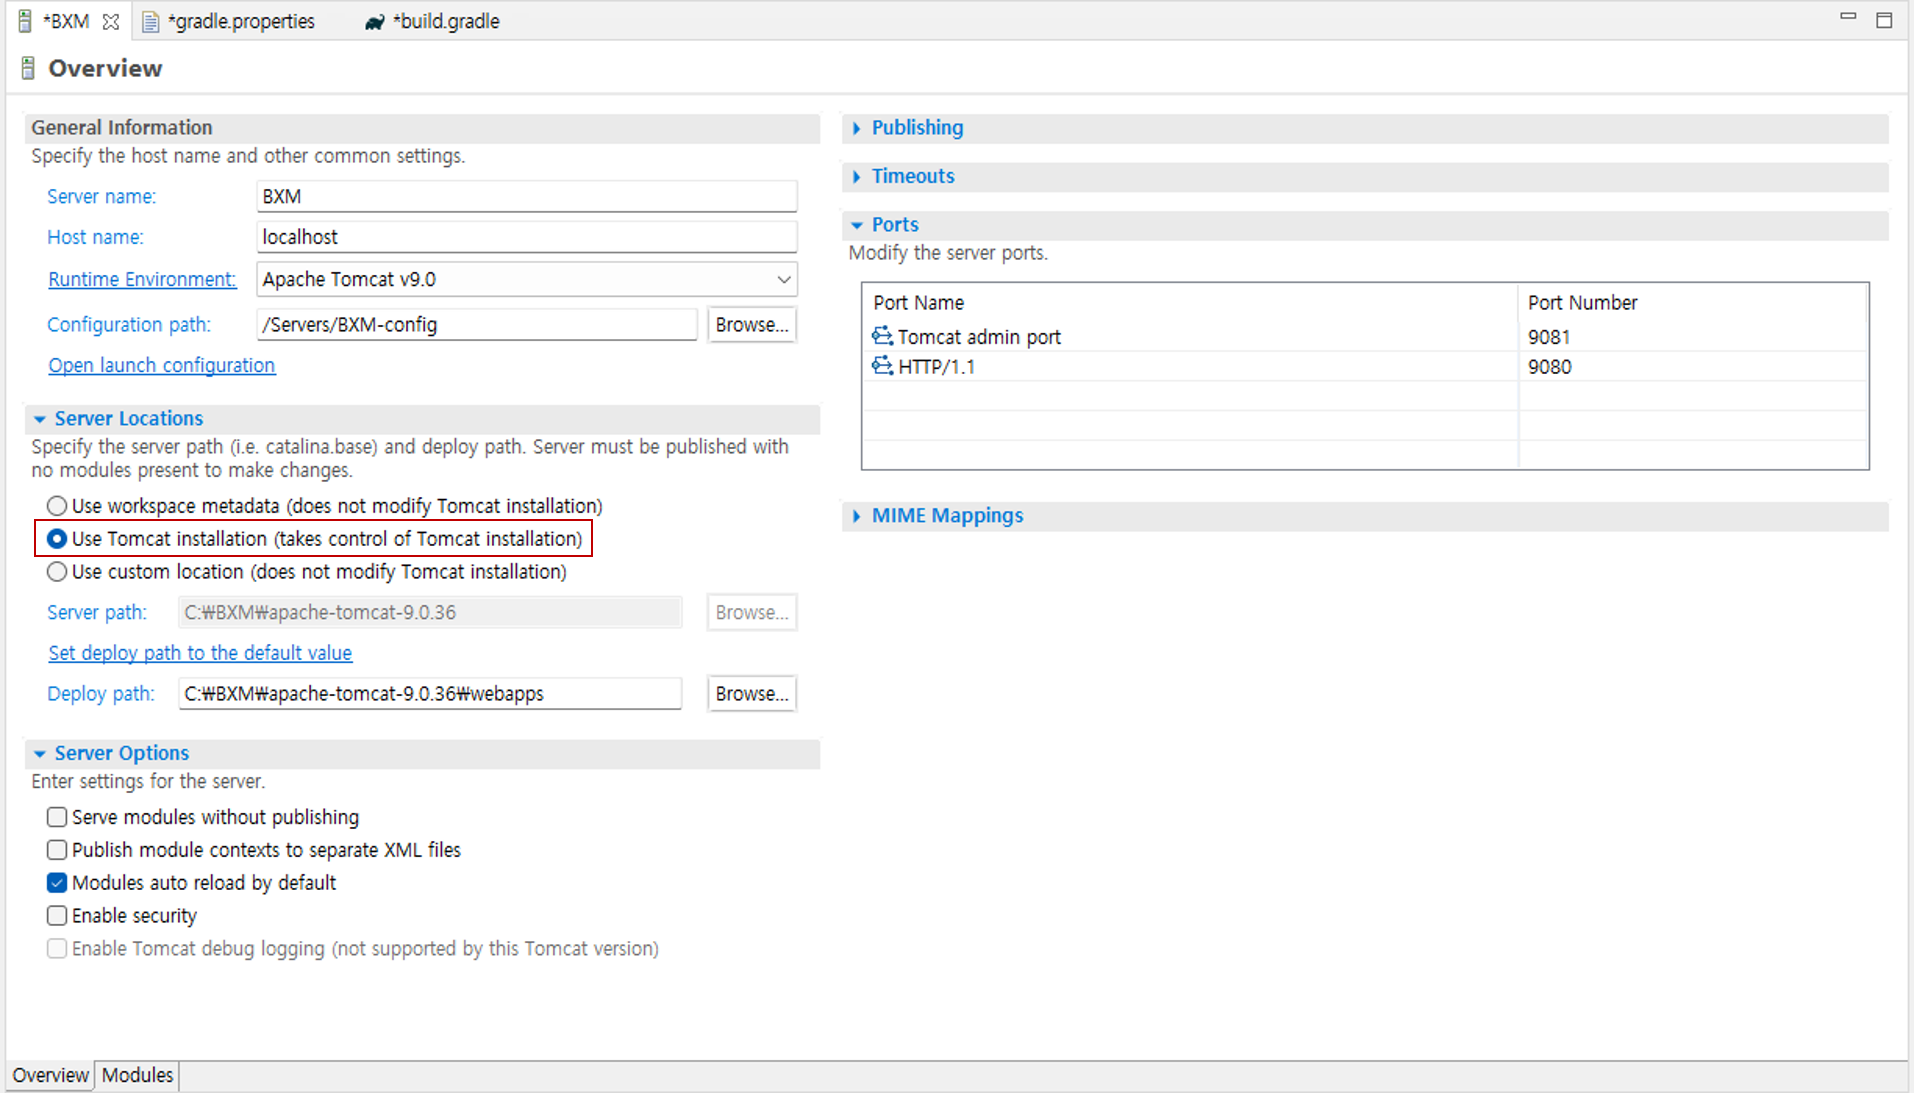
Servers view → double-click BXM → select the Server Locations option (Use Tomcat installation (takes control of Tomcat installation)) → Save
-
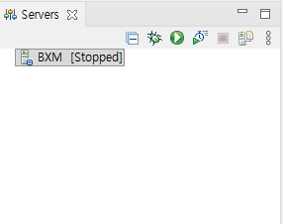
Execution
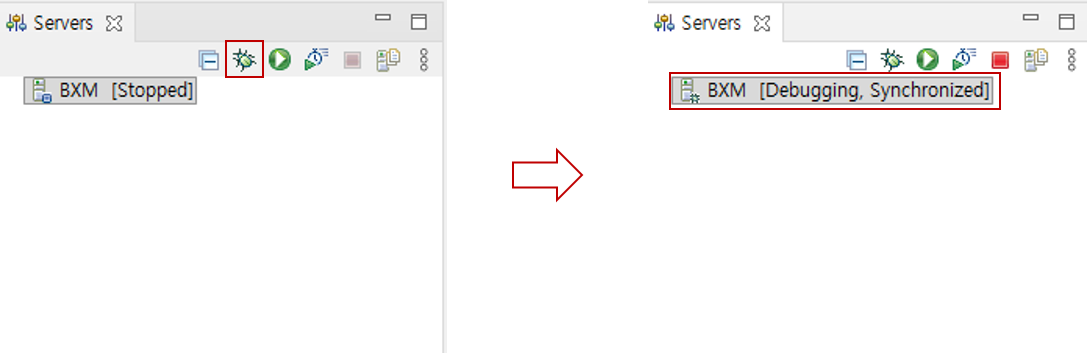
Servers view → select BXM → click the 'Debug' button
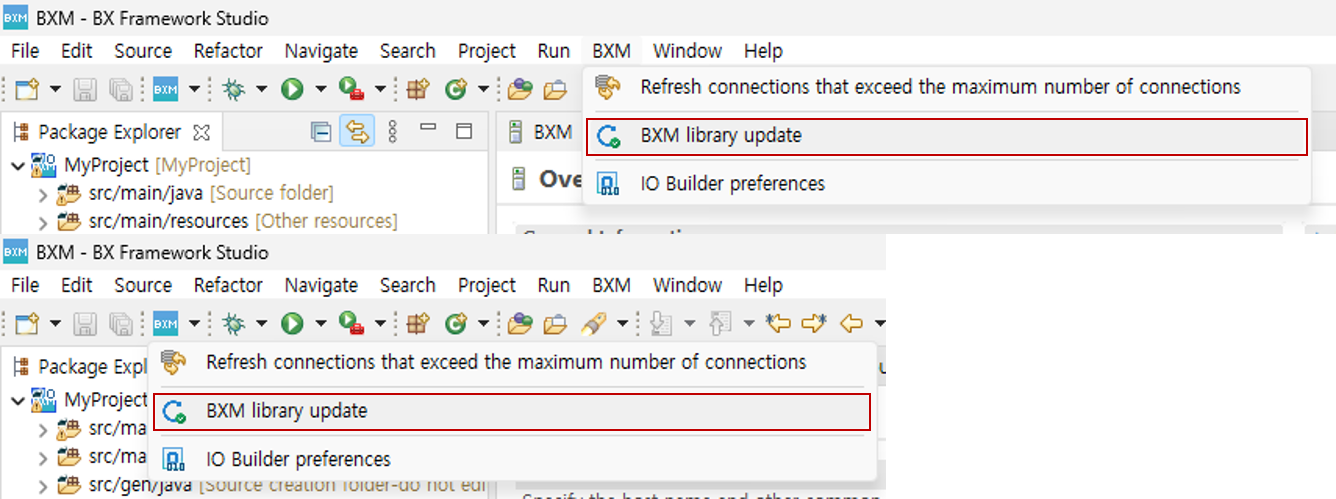
2. Local Development Practice
Local development practice is performed in the following order.
2.1. Application Deployment
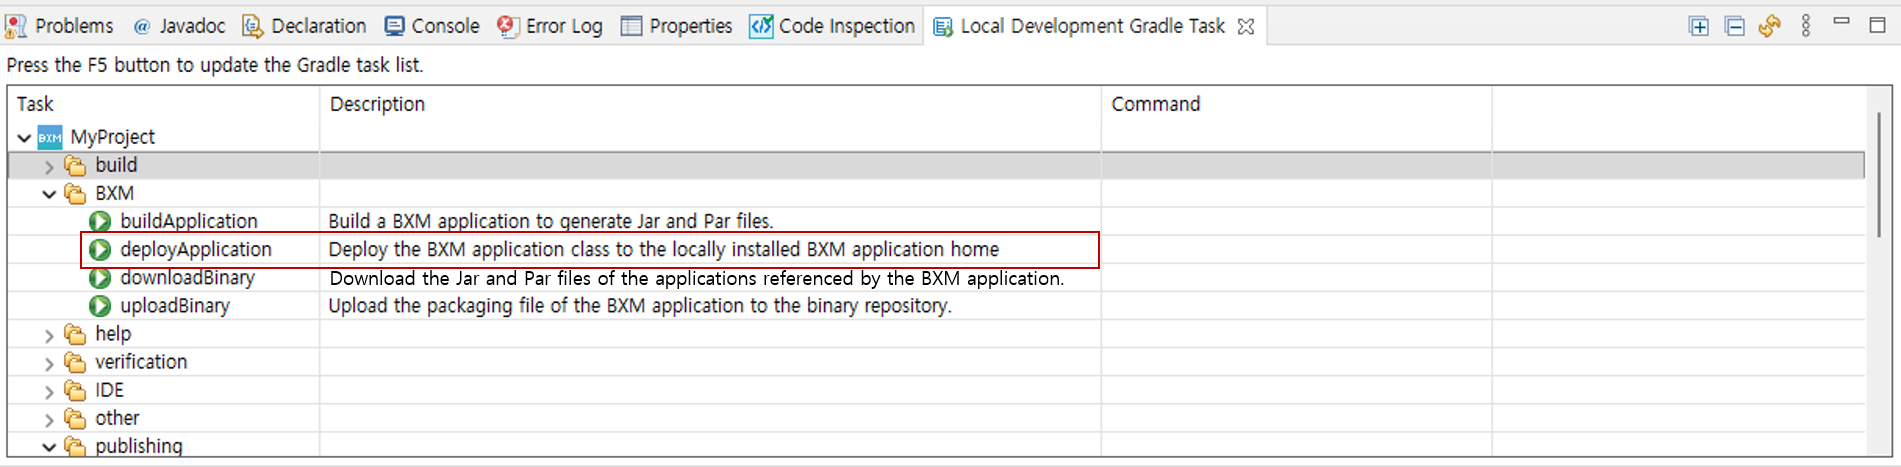
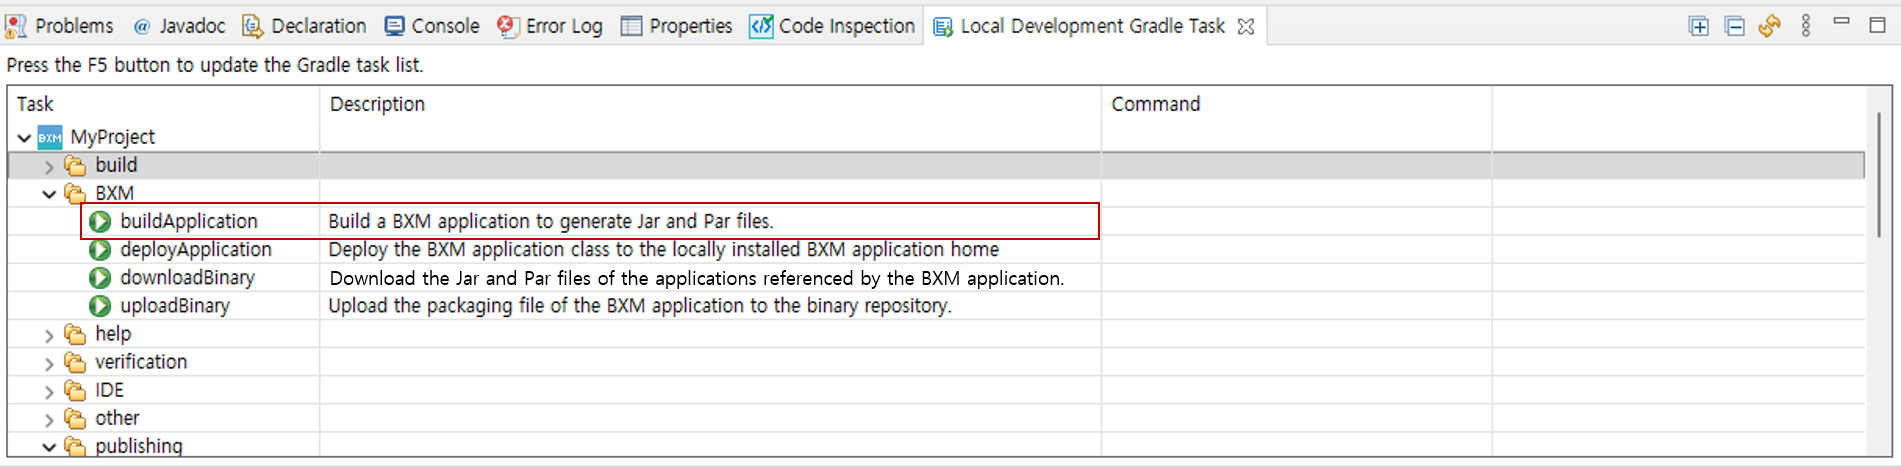
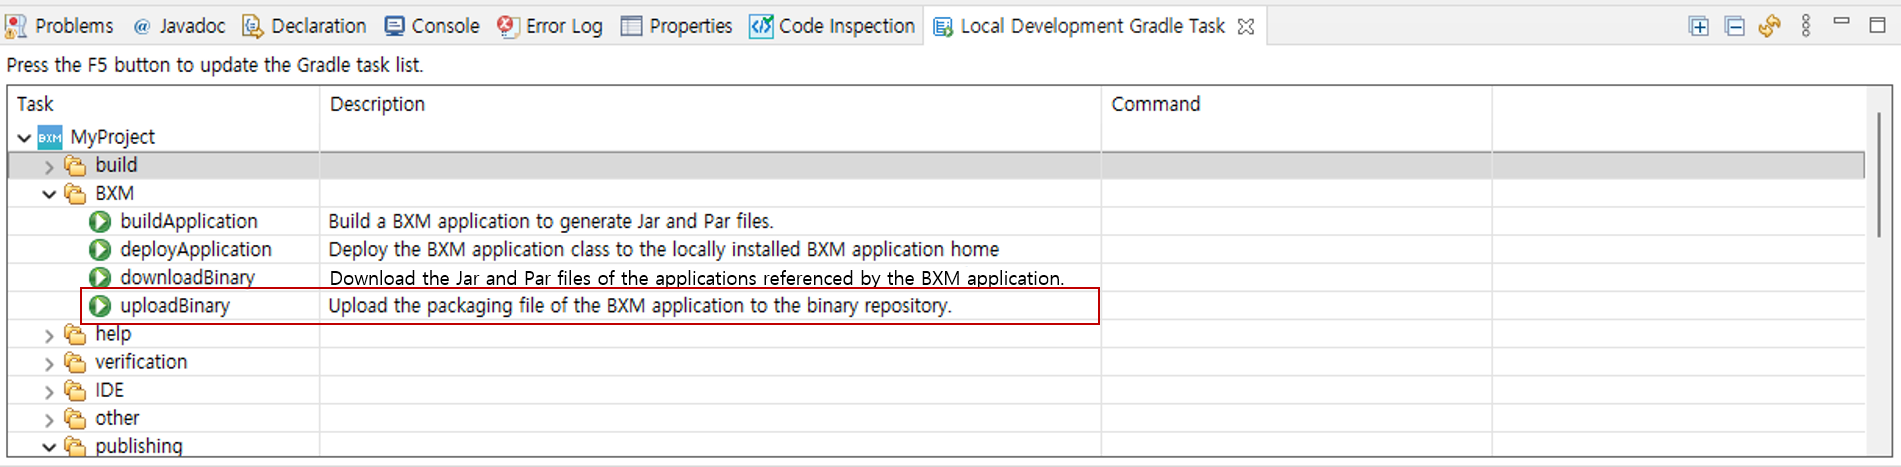
From the top menu of the development tool, go to Window → Show View → Others → BXM → open the 'Local Development Gradle Task' view.

Local Development Gradle Task view → corresponding application → BXM → use 'deployApplication' to deploy the application to the configured deployment path.