Writing DBIO
1. Function
It is a resource for developing SQL used in business and is the physical form of the data component.
2. Creating DBIO IO
-
Create the IO to use in DBIO. Right-click in the Package Explorer → New → select New IO. (Shortcut: Ctrl + N → BXM → select New IO)
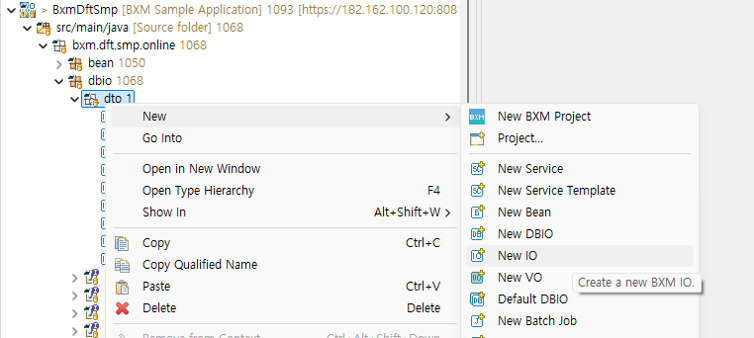 Figure 1. Creating DBIO IO
 -
Enter the IO name.
The DBIO IO was written under the dto package under bxm.dft.smp.onlne.dbio.
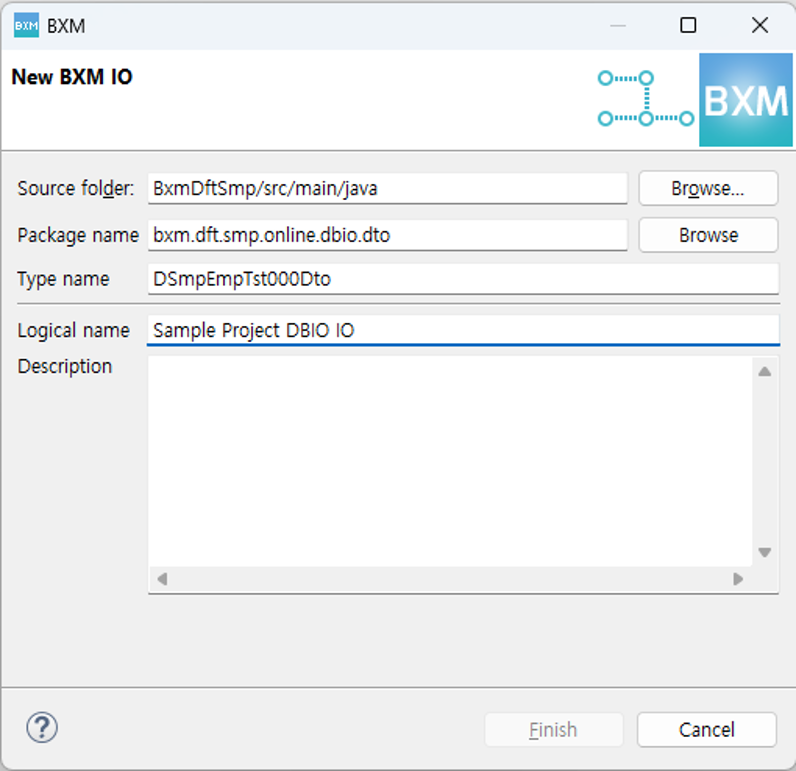 Figure 2. IO Wizard
 -
Define fields in the created IO. When you click the DB→IO button, a popup like the one below appears, and you can import columns of the desired table as fields. Or you can enter them directly.
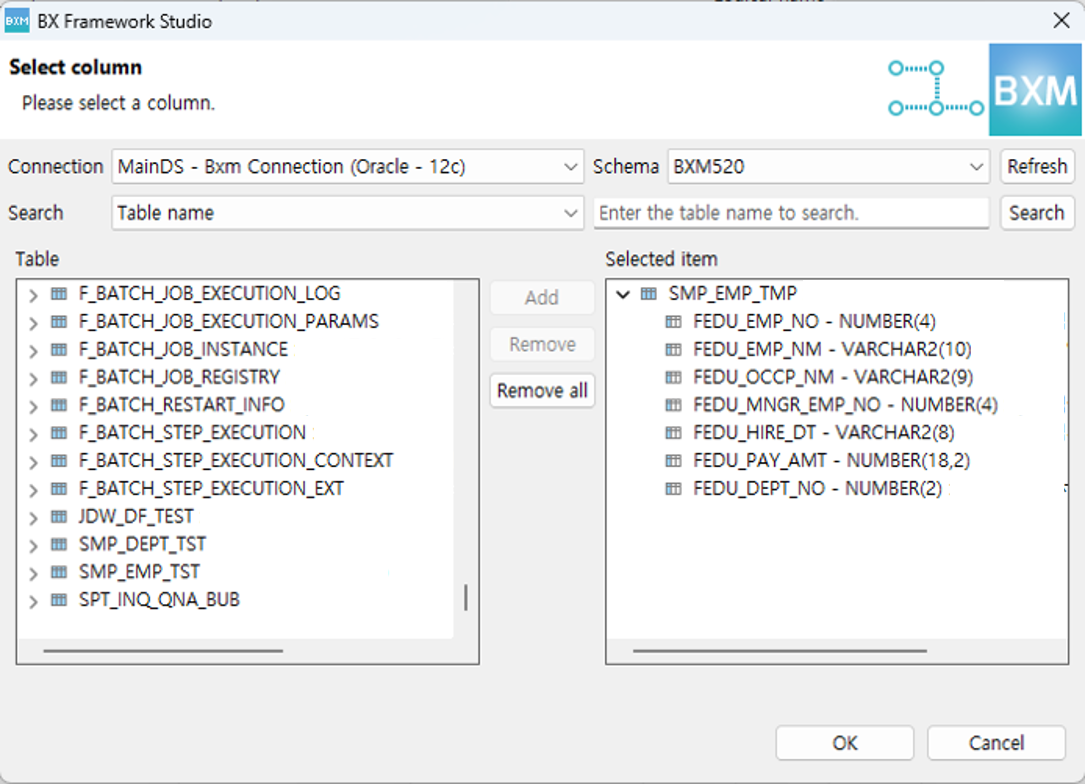 Figure 3. Creating IO fields from DB schema
Below is the created IO. rowId was arbitrarily added for use.
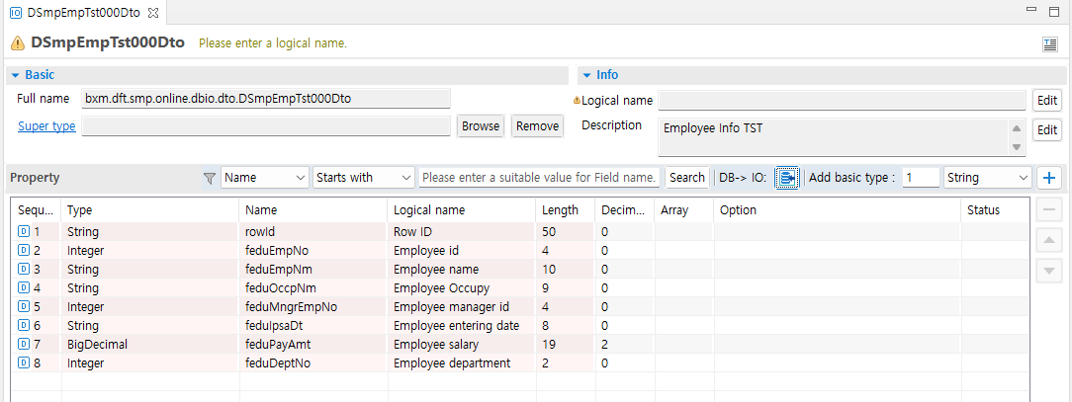 Figure 4. Created DSmpEmpTst000Dto IO
3. Writing DBIO
-
Create DBIO. Right-click in the Package Explorer → New → select New DBIO.
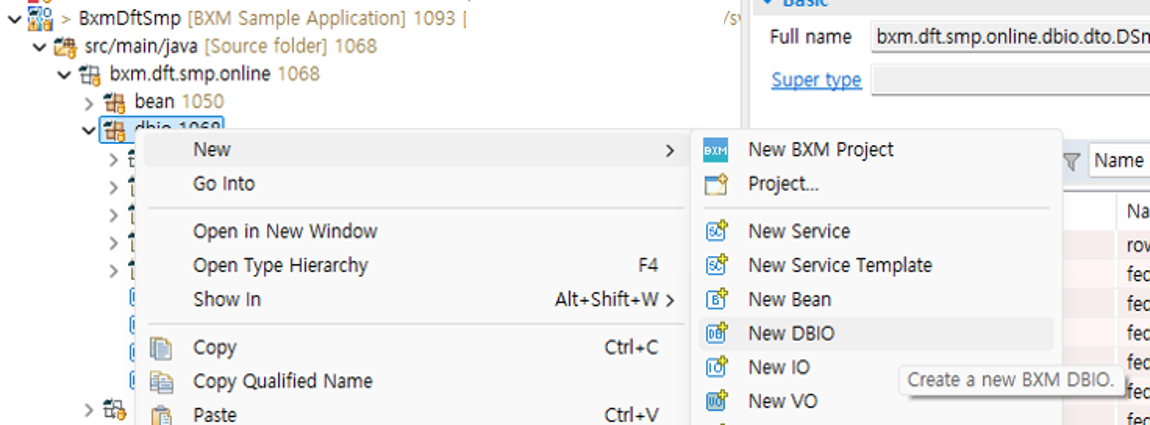 Figure 5. Creating DBIO
 -
Enter the DBIO name and logical name.
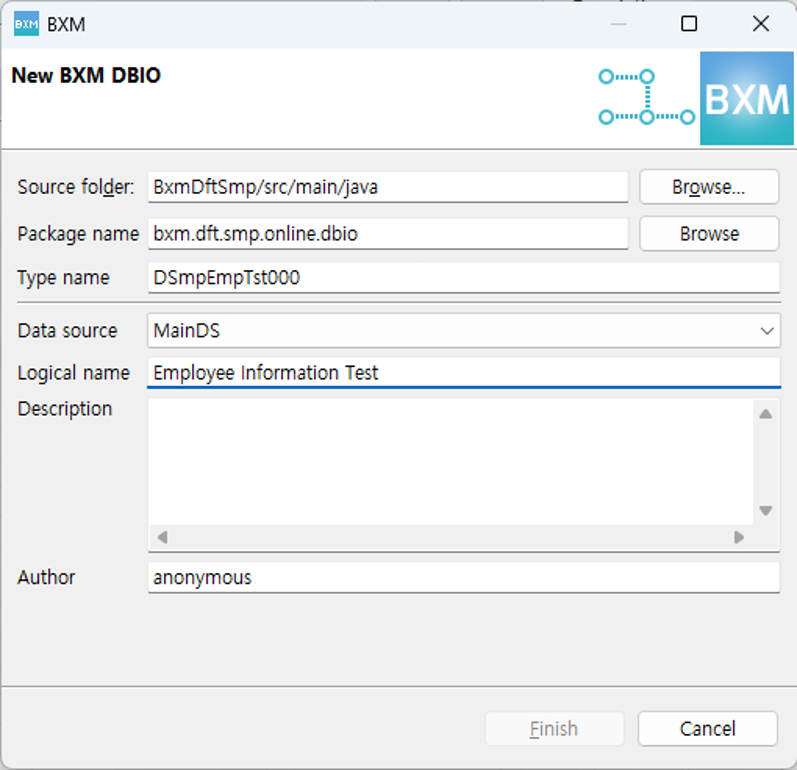 Figure 6. New DBIO Wizard
 -
Enter the SQL ID in the created DBIO, then click the + button to add it.
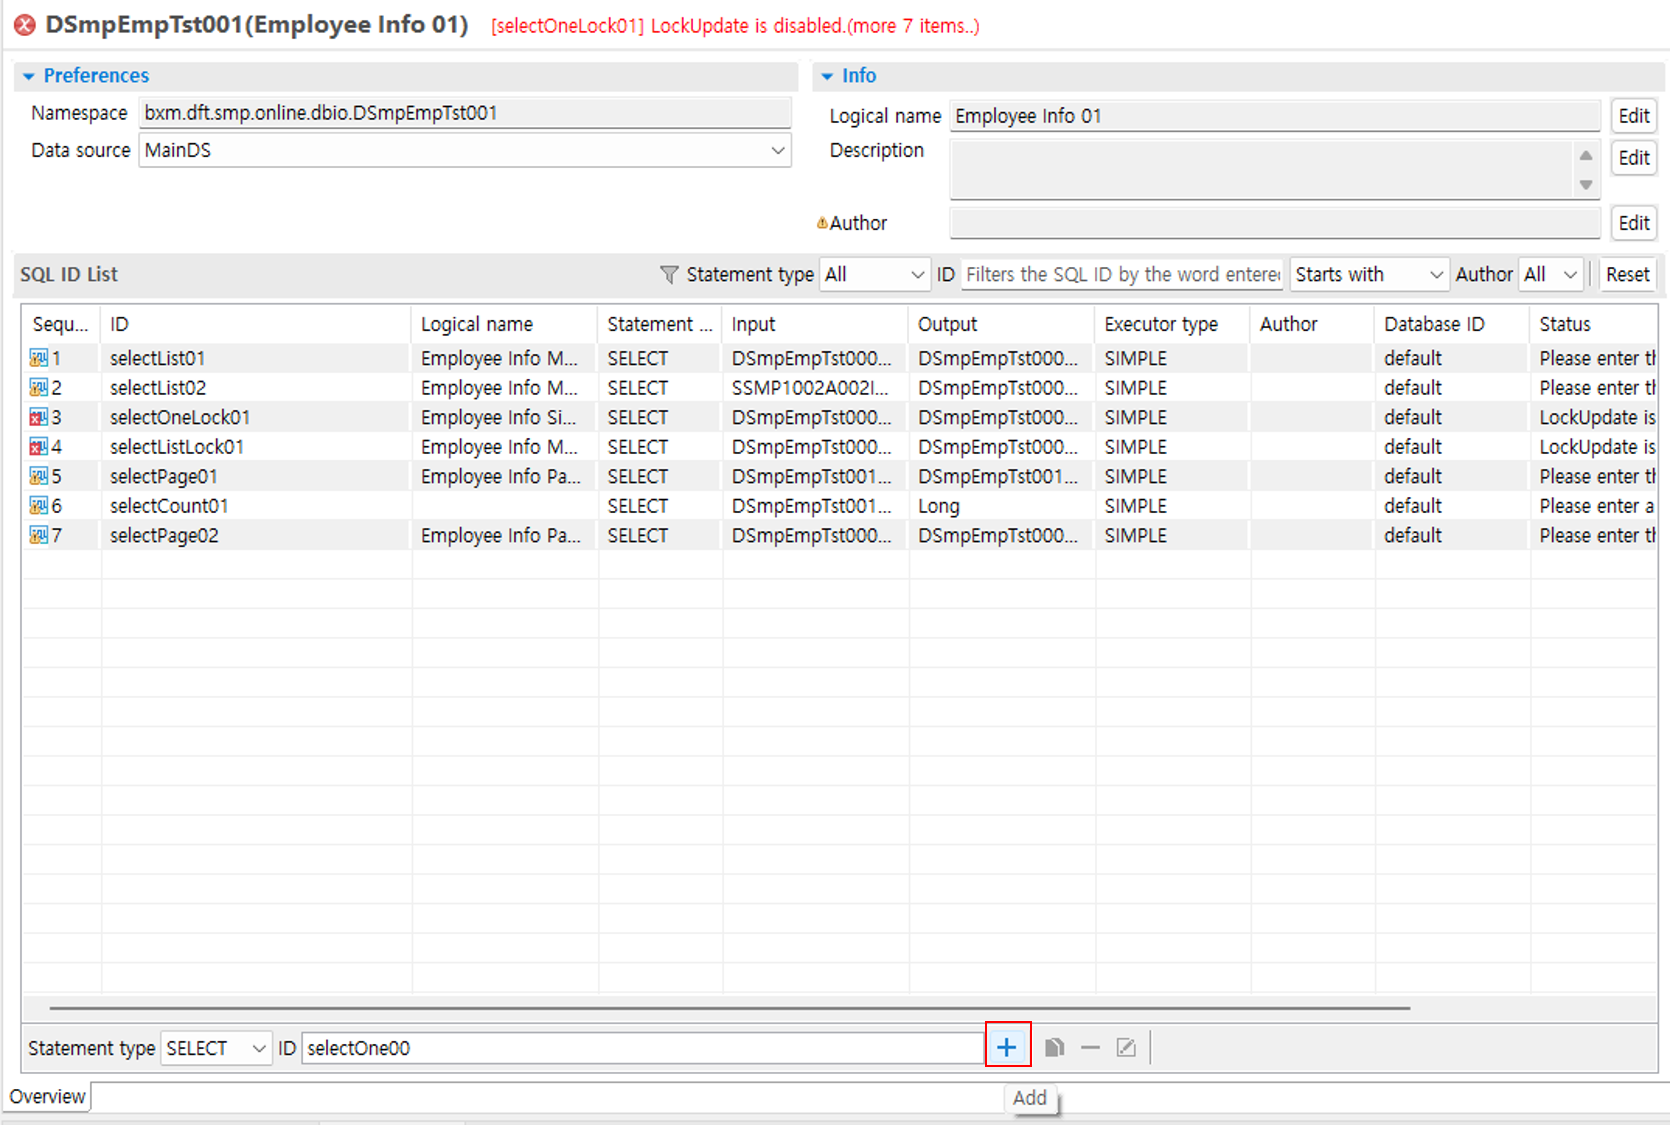 Figure 7. SQL ID list
 -
Enter the SQL and input/output types. For detailed DBIO writing instructions, refer to BXM User Guide - Studio. This guide briefly explains how to write DBIO.
1 : When you click the Default SQL button, SQL is automatically generated according to the selected table and Statement type.
2 : You can view the automatically generated SQL, and you can directly modify/input it.
3 : Search and add the input type.
4 : Search and add the output type.
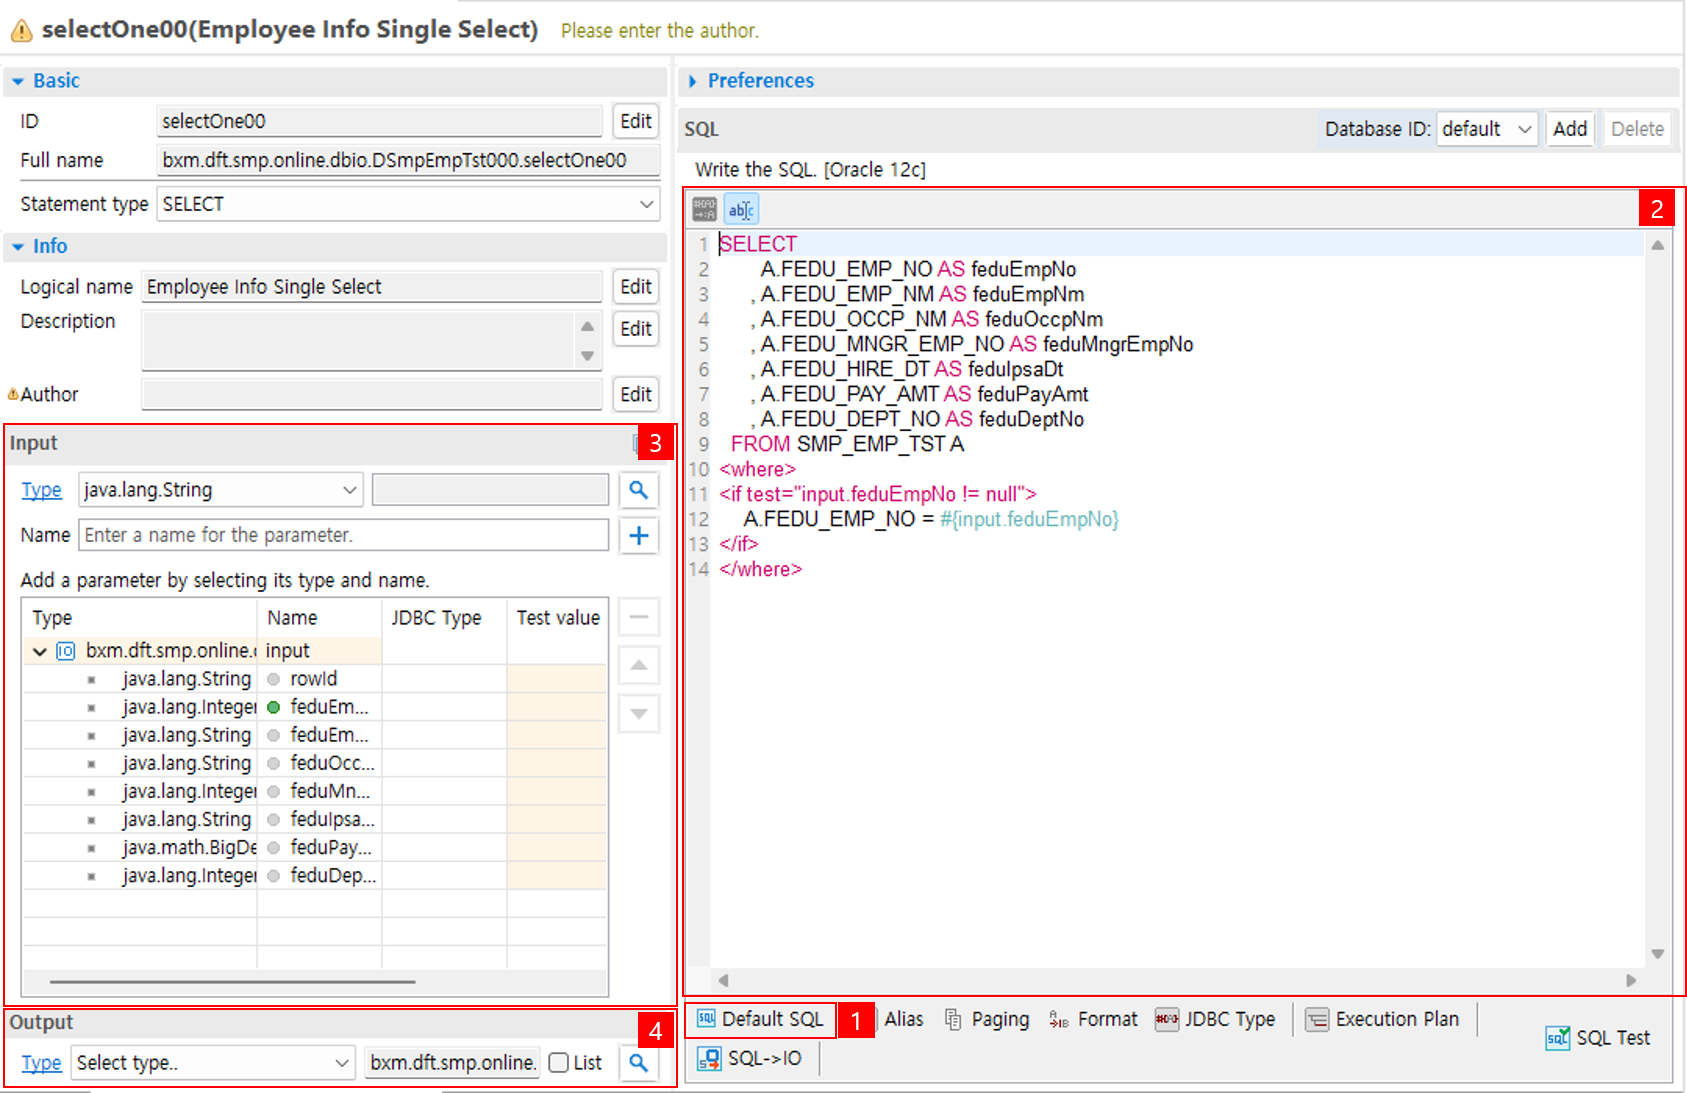 Figure 8. Writing DBIO
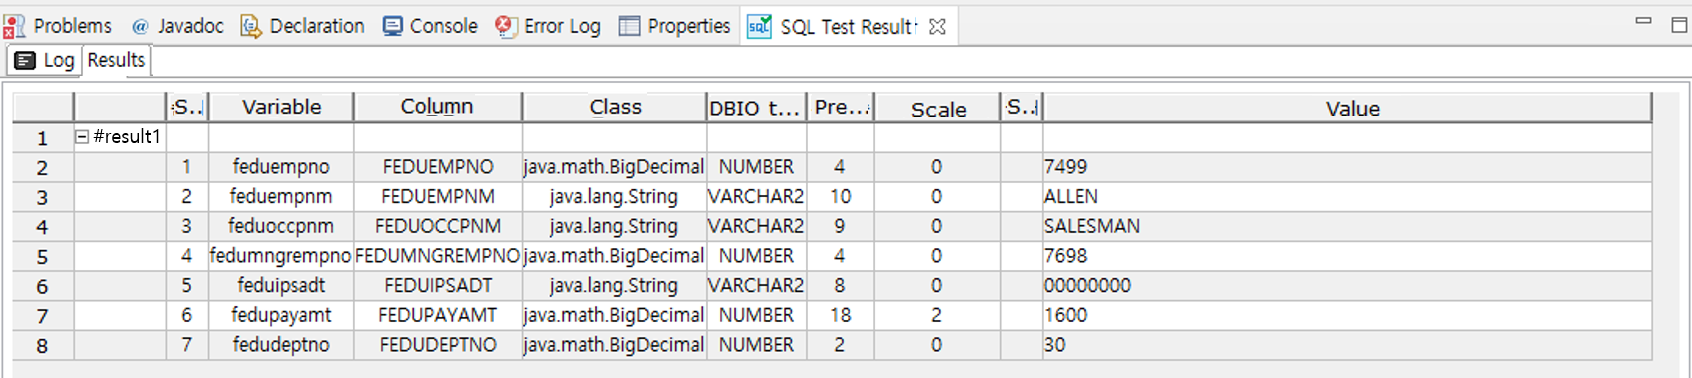
Below is the SQL that was entered.
SELECT
       A.FEDU_EMP_NO AS feduEmpNo
     , A.FEDU_EMP_NM AS feduEmpNm
     , A.FEDU_OCCP_NM AS feduOccpNm
     , A.FEDU_MNGR_EMP_NO AS feduMngrEmpNo
     , A.FEDU_HIRE_DT AS feduHireDt
     , A.FEDU_PAY_AMT AS feduPayAmt
     , A.FEDU_DEPT_NO AS feduDeptNo
FROM SMP_EMP_TST A
WHERE A.FEDU_EMP_NO = #{feduEmpNo}