Getting Started
This document describes how to install, update, and log in to BXM Studio.
2. Runtime Environment
The recommended specifications for smooth execution of BXM Studio are as follows.
| Item | Recommended Specifications |
|---|---|
Memory |
8GB or higher |
Java Version |
JDK 11 or higher |
Storage Device |
SSD (Solid State Drive) 10G or higher (The required capacity may increase depending on the user environment.) |
Operating System |
Windows 10 64 bit or higher |
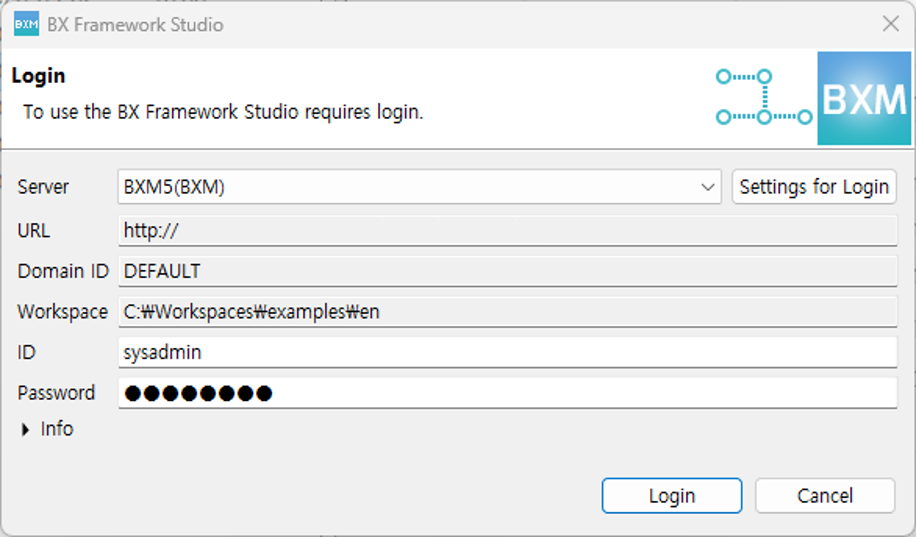
5. Login
You must log in to use BXM Studio.
In the login Dialog, select the desired server, enter your account information, and click the Login button.
6. Specifying the Login Server
You can register the server to be used for login.

-
Click the Settings for Login button in the login Dialog.
-
Enter the required information in the login server Dialog and click the Add button to register the server.
-
ID: Enter the ID of the server.
-
Name: Enter the name of the server.
-
URL: Enter the address of the server.
-
Domain: Click the Domain lookup button on the right to retrieve the domain list and select the domain to use.
-
Workspace: Select the workspace.
-
-
If you need to modify a previously registered server, select the server to be modified and enter the required information. Click Modify to apply the entered information.
8. Studio Update
If a new version of the Studio is available, you can update it through the update menu.
8.1. Checking the Update Site
-
Select Menu → Help →
Install New Software….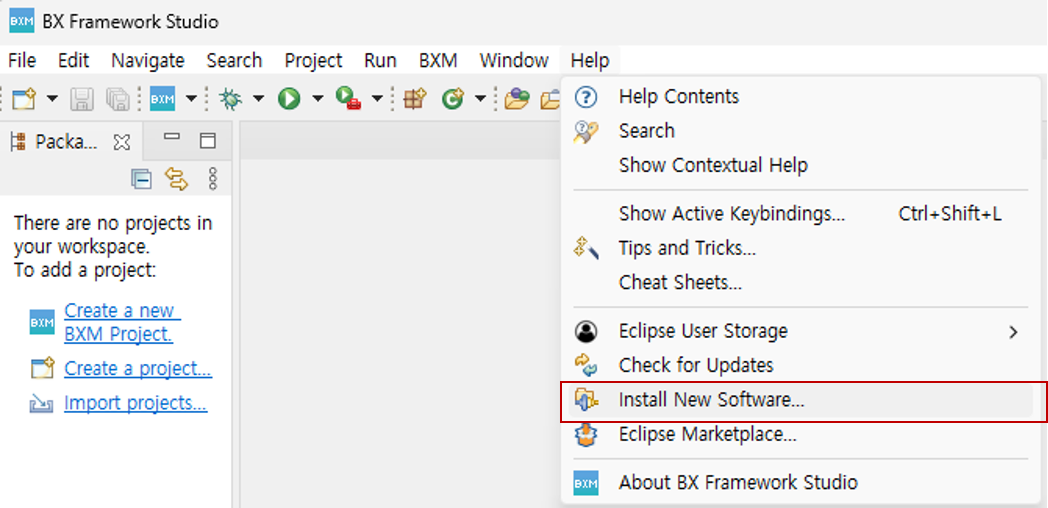
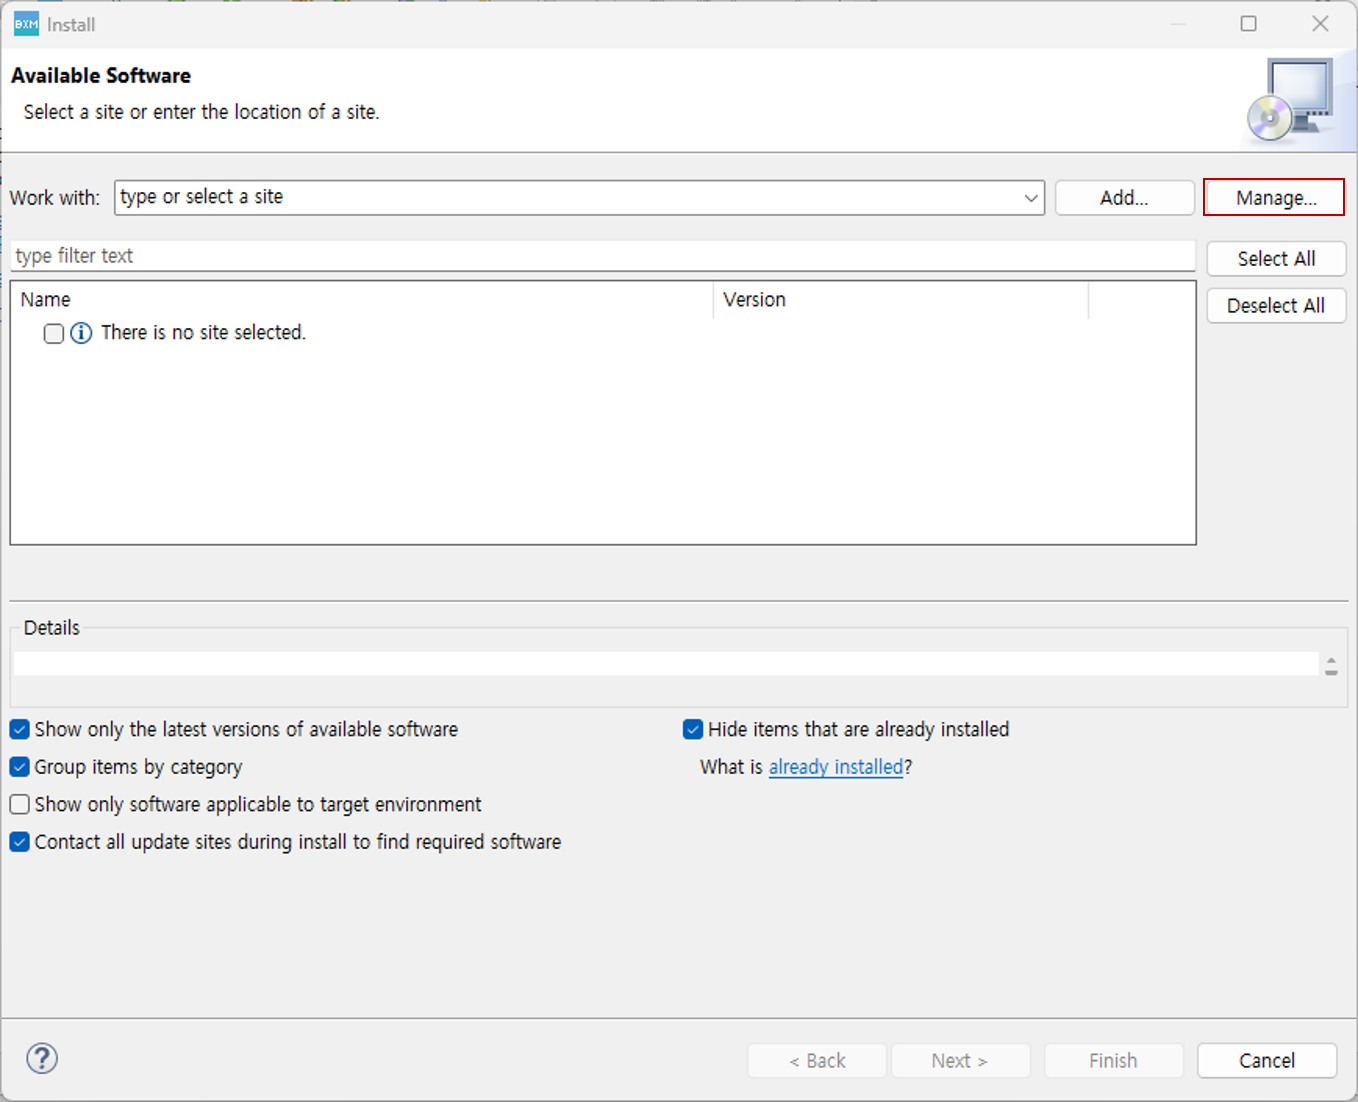
-
In the Install Dialog, click the Manage button.
-
On the Available Software Sites page, check the registered Update Site.
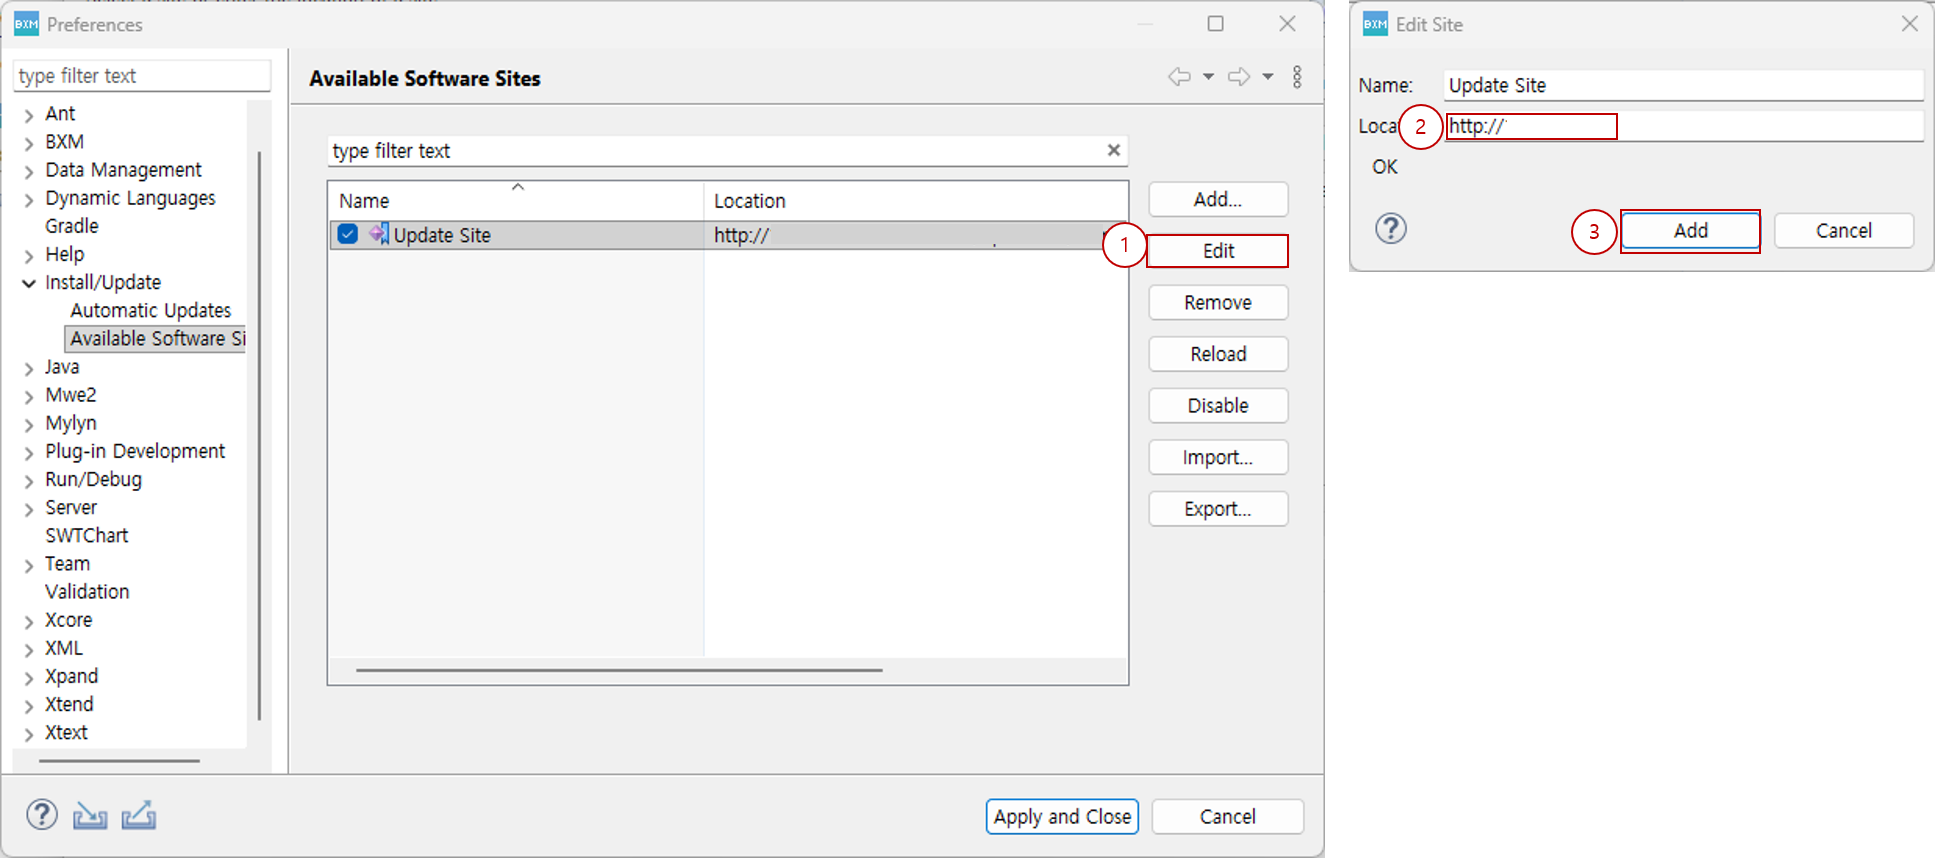
(1) Select the registered Update Site and click the Edit button.
(2) In the Edit Site Dialog, check the URL in the Location field and modify the URL if necessary.
(3) Click the Add button to apply it.
8.2. Modification
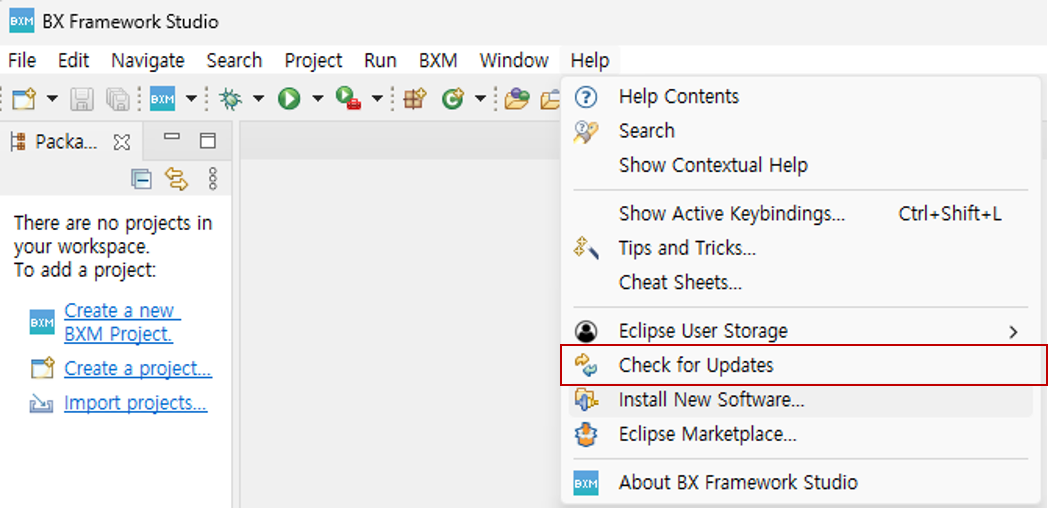
-
Select Menu → Help → 'Check for Updates'.
-
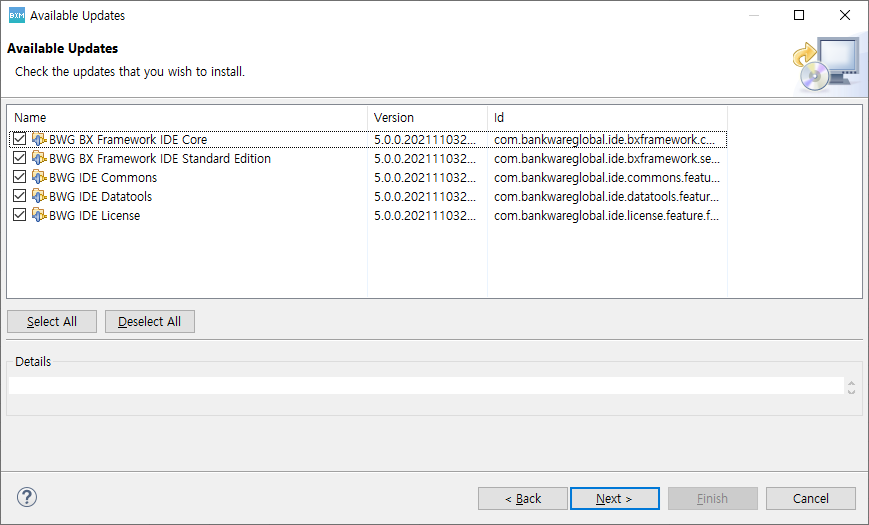
If a new version of the Studio is available, you can check the update list as shown below.
-
Click the Next button in the Dialog in order to complete the update.
-
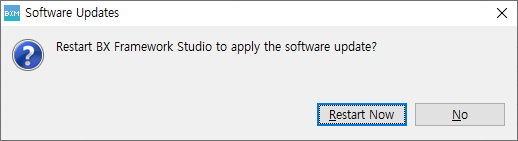
After the update is completed, when the following Dialog opens, click Restart Now to restart the Studio.